
Joomla Migration Checklist | Complete Guide for Joomla 3 to 6
Migrating a Joomla website is not just a technical update. It is an opportunity to modernise your website, remove outdated extensions, improve performance, clean up your content structure and prepare the site for future Joomla versions.
This Joomla Migration Checklist is written especially for website owners, developers and agencies planning to move from Joomla 3 to Joomla 6, but the same principles also apply to migrations from Joomla 4 to Joomla 5, Joomla 5 to Joomla 6, or older Joomla websites that need to be brought back to a supported version.
- Planning a Joomla 3 to Joomla 6 migration
- Preparing a Joomla 4 or Joomla 5 upgrade
- Cleaning old Joomla articles before migration
- Checking extension, template, SEO and server requirements
- Looking for a safer way to bulk update Joomla content
If your website is still running Joomla 3, migration should be treated as a priority. Joomla 3 reached end of support in August 2023, which means it no longer receives official security updates from the Joomla project. Even if the website still appears to work correctly, outdated core files, older PHP code and unsupported third-party extensions can create long-term security and maintenance risks.
However, a successful Joomla migration is not only about reaching the latest version number. Many Joomla websites have grown over years. They often contain hundreds or thousands of articles, old categories, duplicated menu items, unused modules, outdated templates, abandoned extensions, broken images, inconsistent aliases and incomplete metadata. Simply upgrading the CMS without reviewing this structure can carry old problems into the new website.
That is why a migration should always be planned in phases. Before touching the live website, you should create a full backup, prepare a staging copy, review your hosting requirements, check extension compatibility and decide what content should be kept, removed, merged or reorganised.
- Why migrate Joomla?
- Plan your Joomla migration
- Backup and staging
- Prepare your Joomla content
- Perform the migration
- Post-migration checks
- SEO and performance checks
- Bulk optimisation with Content Uploader
- Printable checklist
- FAQ
Why Joomla Migration Needs More Than a Simple Update
Joomla migrations can fail for many different reasons. In some cases, the server does not meet the requirements of the target Joomla version. In others, an old plugin, component or template override triggers PHP errors after the upgrade. Sometimes the migration itself succeeds, but important parts of the website stop working afterwards, such as contact forms, menus, search, custom fields, ecommerce features or article layouts.
Content is another major part of the migration process. Many site owners focus only on extensions and templates, but the content database is often the most valuable part of the website. Articles, categories, aliases, intro images, full article images, metadata, custom fields and publishing settings all need to survive the migration correctly.
This is where planning your content workflow can save a large amount of time. Instead of manually editing hundreds of Joomla articles one by one, you can export your content to Excel or CSV, review it in a spreadsheet, clean up titles, aliases, categories, metadata and custom fields, then import the improved data back into Joomla. This is especially useful when migrating from Joomla 3 to newer versions, because the migration project becomes a chance to improve the website instead of simply moving old content into a new installation.
For larger websites, tools such as Content Uploader Pro can support this process by making bulk content editing easier. You can prepare article data outside the Joomla administrator, update many records at once and reduce the amount of repetitive manual work during the migration.
Migrating a content-heavy Joomla site?
What This Joomla Migration Checklist Covers
This guide walks through the full migration process from planning to post-migration testing. It covers server requirements, backups, staging environments, extension checks, template compatibility, content preparation, article migration, SEO checks and final validation before the new website goes live.
The goal is not only to help you avoid migration problems. The goal is to help you use the migration as an opportunity to build a cleaner, faster and easier-to-maintain Joomla website.
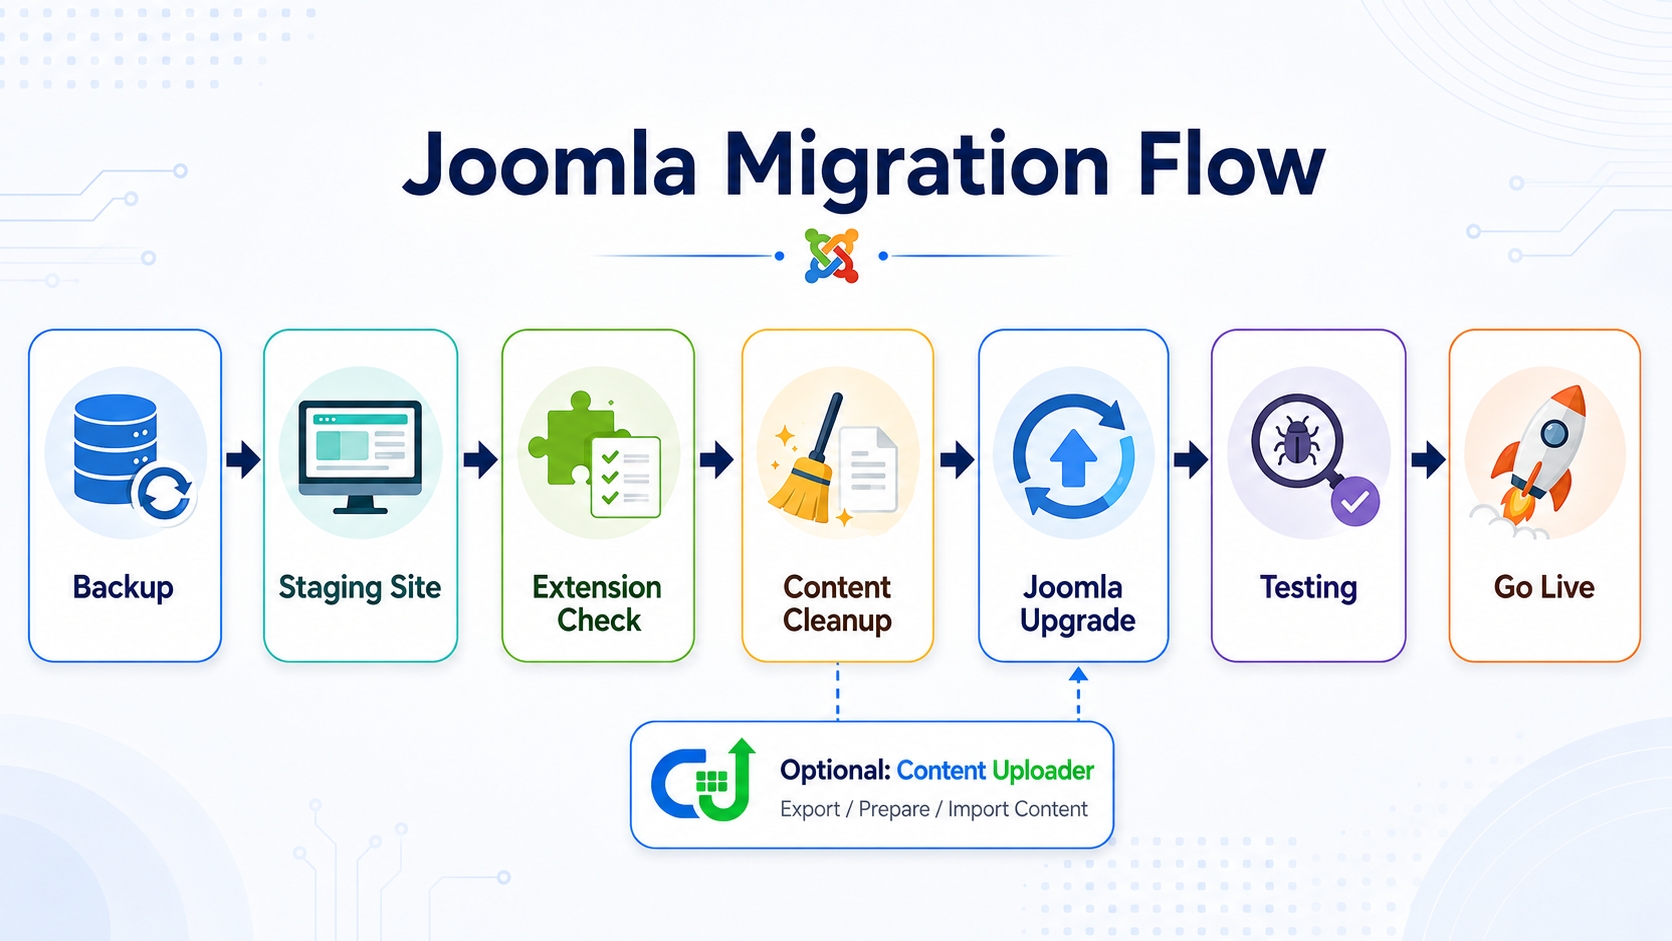
Phase 1: Plan Your Joomla Migration
A successful Joomla migration starts long before the first update button is clicked. Planning is the difference between a controlled migration and a stressful recovery job. Before upgrading from Joomla 3 to Joomla 6, or from any older Joomla version to a newer one, you should understand the current state of your website, the target version you want to reach, and the risks that may appear along the way.
The most important thing to remember is this: a Joomla migration is not just a software update. It affects your server environment, extensions, template, database, menus, modules, articles, categories, custom fields, media files, redirects and SEO performance. Treat it as a website project, not as a quick maintenance task.
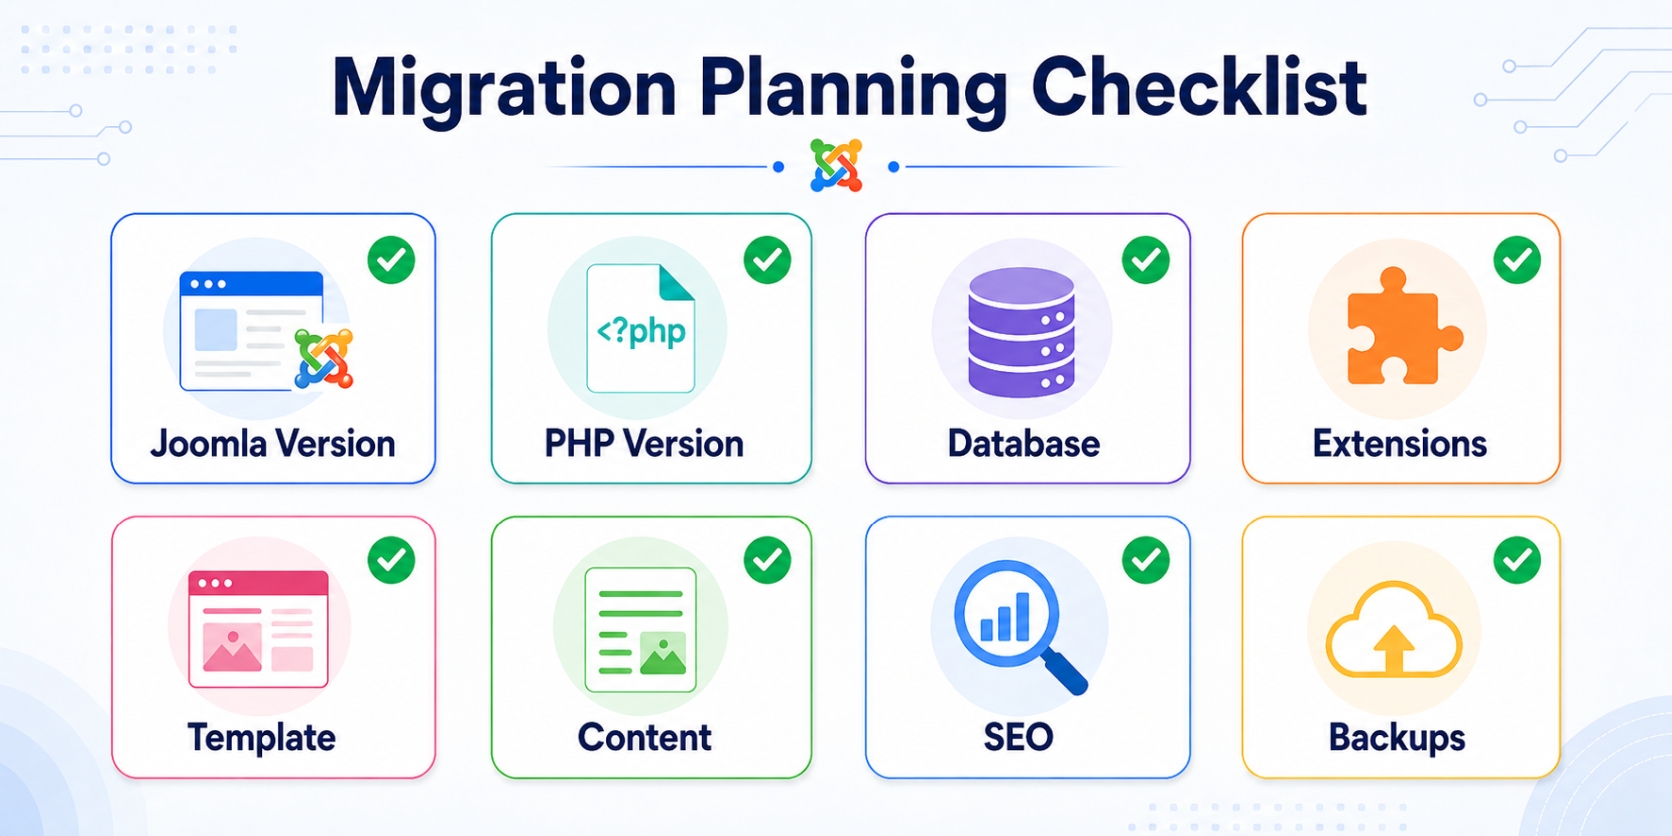
Understand Your Current Joomla Version
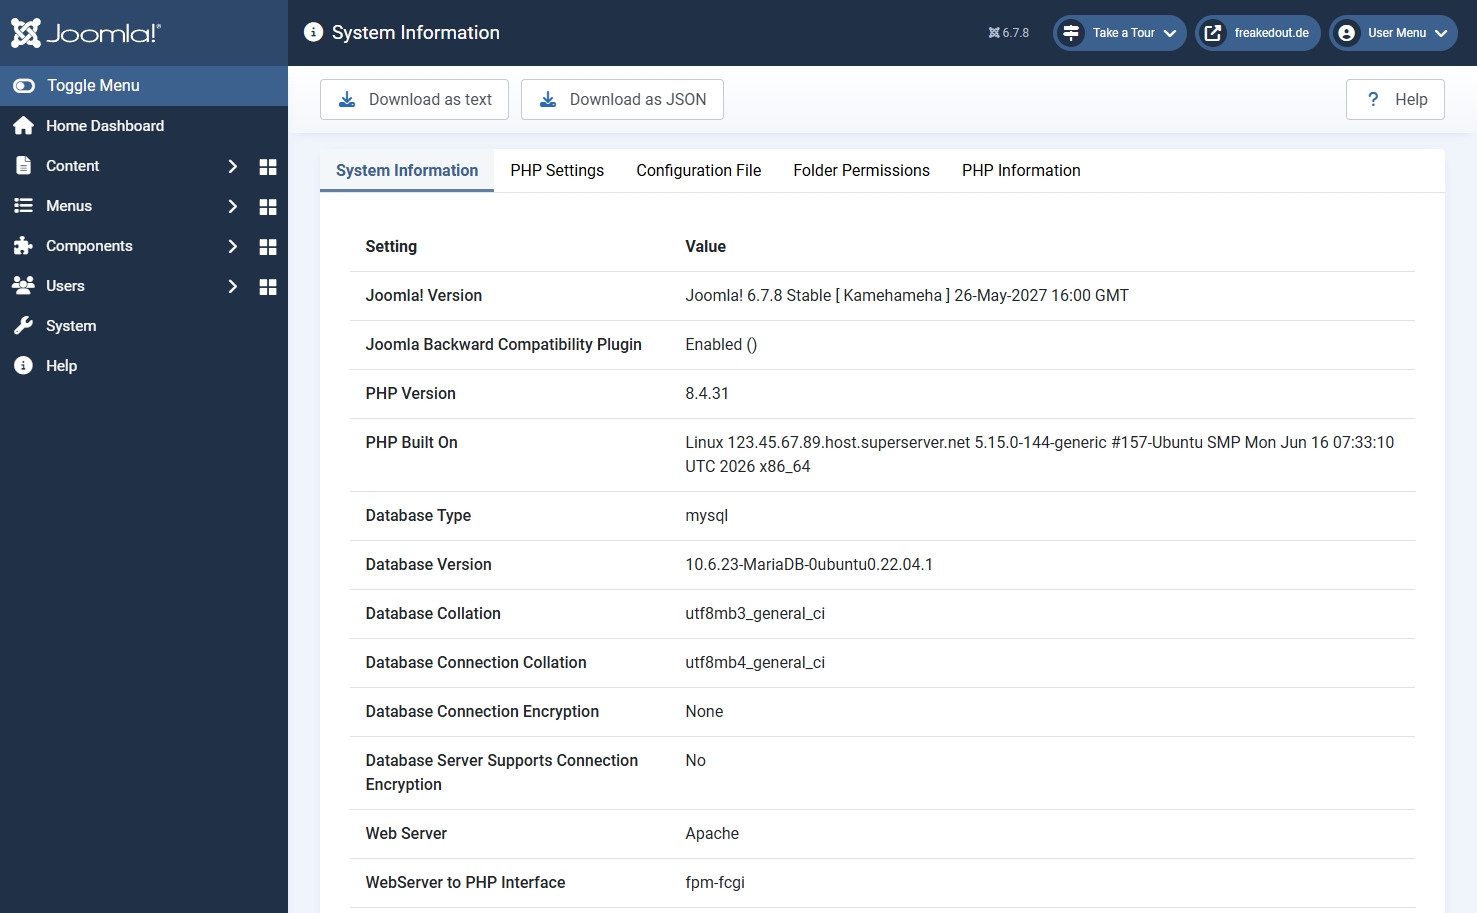
Start by confirming exactly which Joomla version your website is using. In the Joomla administrator, go to:
System → System Information
Record the following information:
- Current Joomla version
- Current PHP version
- Database type and version
- Web server software
- Installed template
- Installed third-party extensions
This information helps you determine how complex the migration will be. A clean Joomla 5 website with a modern template and only a few maintained extensions may be a straightforward upgrade to Joomla 6. A Joomla 3 website with older plugins, custom template overrides and abandoned extensions requires more preparation.
Know the Joomla Upgrade Path
If you are still using Joomla 3, you should not think of the process as one single jump from Joomla 3 to Joomla 6. In most cases, the safer approach is to move through the major versions step by step, testing carefully at each stage.
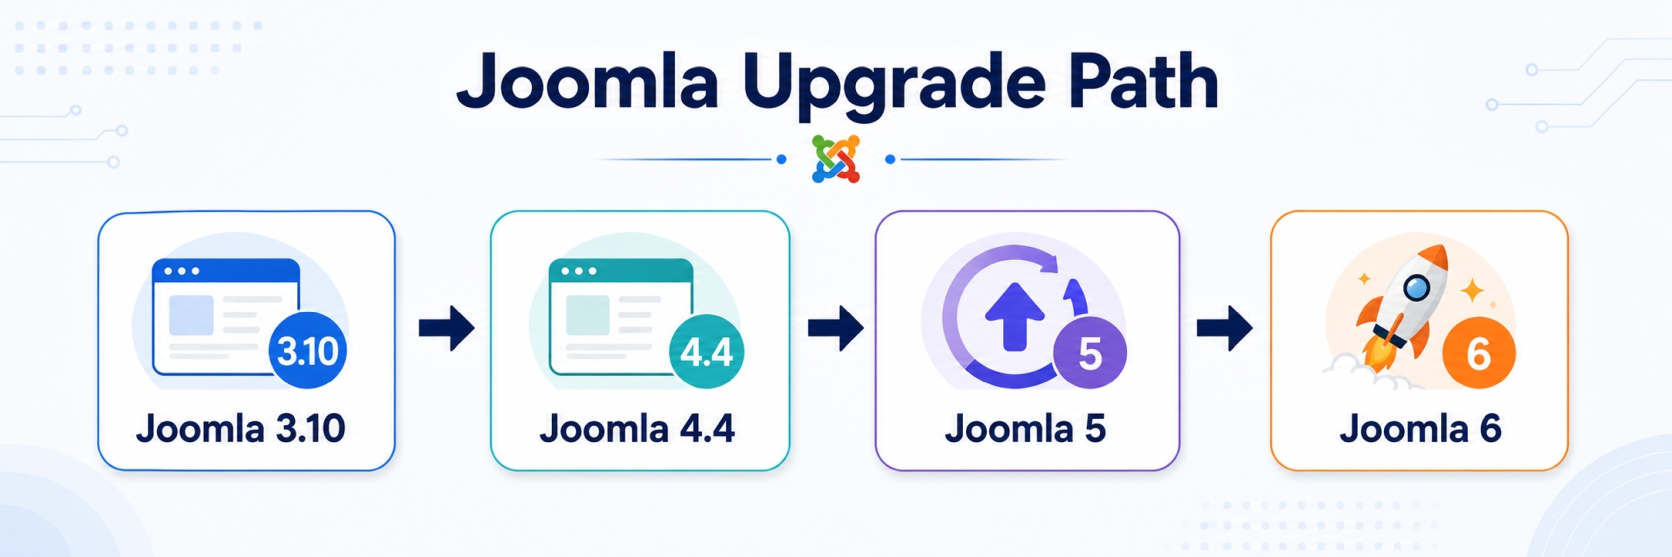
A typical migration path looks like this:
- Joomla 3.10.x → Joomla 4
- Joomla 4.4.x → Joomla 5
- Joomla 5.x → Joomla 6
Each step should be tested on a staging copy before it is repeated on the live website. This is especially important for Joomla 3 websites, because Joomla 3 sites often depend on older extensions or templates that were originally built for older PHP versions.
Do not assume that because the frontend still works, the website is ready for migration. Many older extensions only fail when they are loaded under a newer Joomla or PHP version.
Check the Joomla 6 Server Requirements
Before planning a Joomla 6 migration, confirm that your hosting environment supports Joomla 6. Server requirements are one of the most common blockers during a migration.
| Software | Minimum for Joomla 6 | Recommended for Joomla 6 |
|---|---|---|
| PHP | 8.3.0 | 8.4 |
| MySQL | 8.0.13 | 8.4 |
| MariaDB | 10.4 | 12.0 |
| PostgreSQL | 12.0 | 17.6 |
| Apache | 2.4 | Latest 2.4.x version |
| Nginx | 1.26 | 1.29 |
| Microsoft IIS | 10 | 10 |
For many Joomla 3 websites, the PHP version is the first major obstacle. Joomla 3 sites often run on older PHP versions, while Joomla 6 requires PHP 8.3 or higher. This means you need to test not only Joomla itself, but also every extension, plugin and template override under the newer PHP version.
Create an Extension Inventory
Next, list every installed extension. Include components, modules, plugins, packages, templates and libraries. For each extension, check whether it is still needed and whether it supports your target Joomla version.
Your extension inventory can use a simple table like this:
| Extension | Type | Used? | Joomla 6 Compatible? | Action |
|---|---|---|---|---|
| Example Gallery | Component | Yes | Check developer website | Update before migration |
| Old Social Plugin | Plugin | No | No | Uninstall |
| Custom Template | Template | Yes | Needs testing | Test on staging site |
Remove extensions that are no longer used. Every unnecessary extension increases the risk of migration problems. Old plugins are especially dangerous because they may load on every page request and cause errors even when you are not actively using them.
Pay special attention to system plugins, editor plugins, page builders, ecommerce components, form builders, gallery extensions and custom field plugins. These often interact deeply with Joomla and may require version-specific updates.
Review Your Template and Overrides
Your Joomla template is another critical part of the migration. A site may technically upgrade successfully while the design breaks because the template, template framework or overrides are not compatible with the new Joomla version.
Check the following:
- Is the template still maintained?
- Does the template developer support Joomla 6?
- Does the template framework need an update?
- Are there custom overrides in the template folder?
- Does the site depend on old Bootstrap markup?
- Are there custom JavaScript files that may conflict with newer libraries?
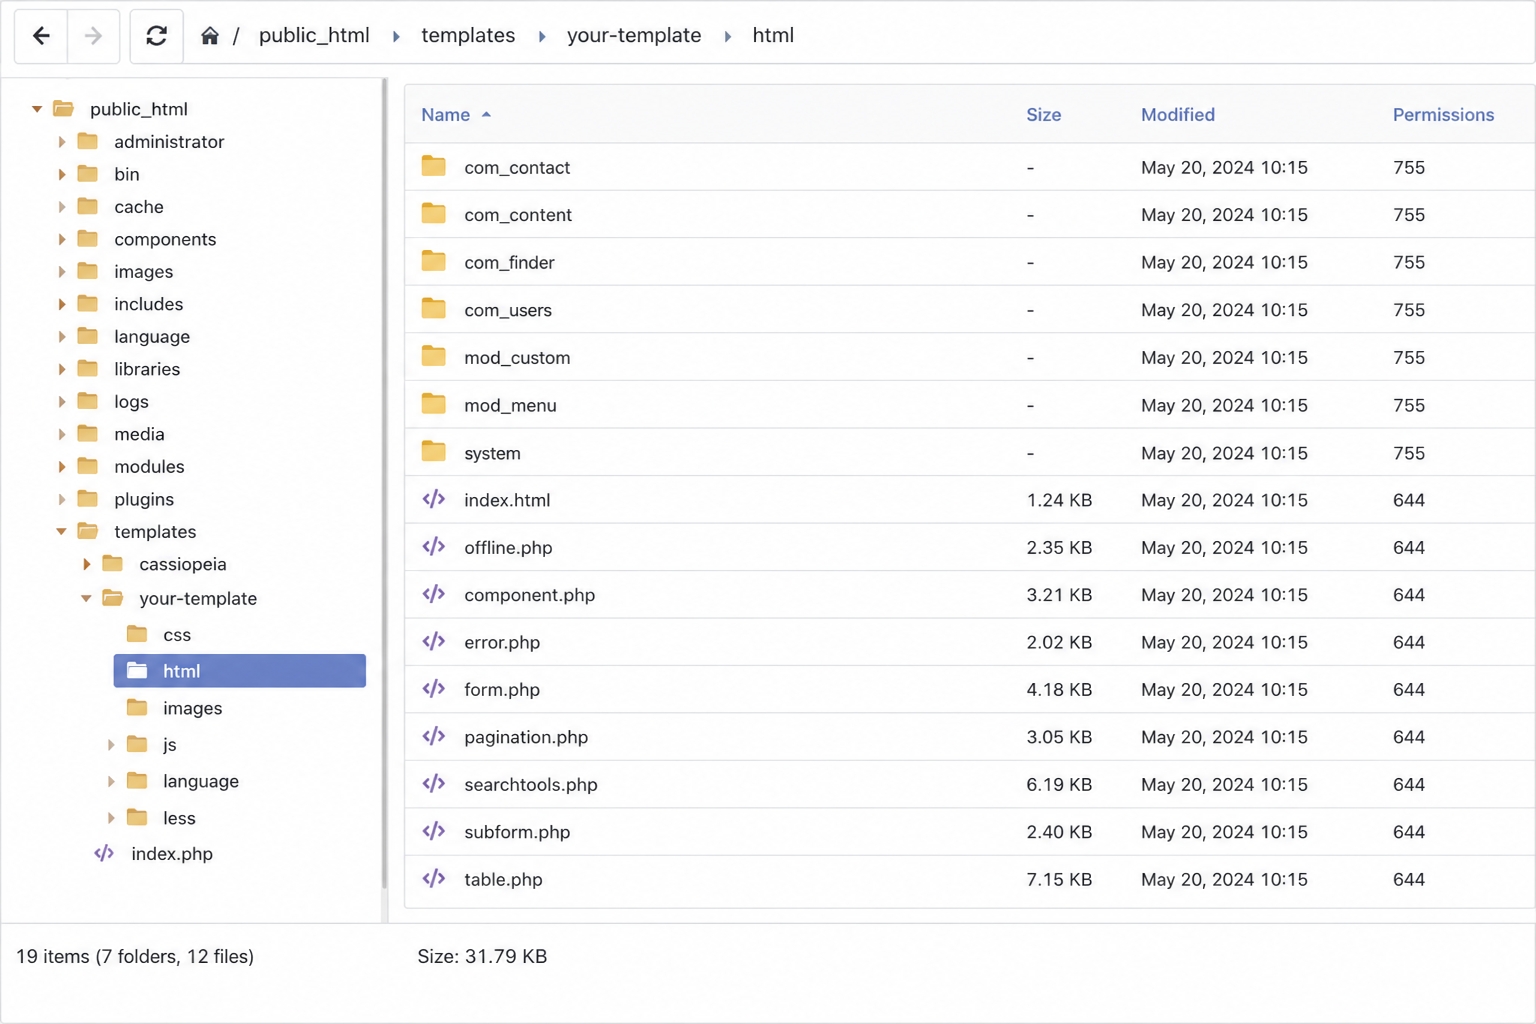
Template overrides are easy to forget. They may contain old Joomla layout code that worked perfectly in Joomla 3 but needs adjustment in Joomla 5 or Joomla 6. If articles, category blogs, contact pages or modules look broken after migration, template overrides are often the reason.
Audit Your Joomla Content Before Migration
Content planning is one of the most overlooked parts of Joomla migration. Many website owners focus on extensions and server versions, but the content structure is often where the real value of the website lives.
Before migrating, review your:
- Articles
- Categories
- Menu items
- Aliases
- Intro images and full article images
- Metadata and meta descriptions
- Custom fields
- Publishing states
- Featured articles
- Author assignments
This is also the ideal time to decide what should be cleaned up. Old Joomla websites often contain outdated articles, duplicated content, unused categories, inconsistent article aliases and missing metadata. If you migrate everything without reviewing it, you carry those problems into the new website.
For larger websites, manual content cleanup in the Joomla administrator can take a long time. This is where spreadsheet-based workflows become very useful. With Content Uploader Pro, you can export Joomla articles to Excel or CSV, review them outside Joomla, clean up titles, aliases, categories, metadata and custom fields, and then import the improved content back into Joomla.
This makes the migration more than a technical upgrade. It becomes a chance to improve the structure and quality of the website before moving fully to the new Joomla version.
Define the Migration Scope
Before starting, decide what the migration should include. Not every website needs the same approach.
Ask these questions:
- Are you migrating the full website or only selected content?
- Will the existing template be kept or replaced?
- Will the category structure remain the same?
- Will URLs and aliases stay unchanged?
- Will old articles be removed or archived?
- Will metadata be rewritten?
- Will custom fields be added, removed or reorganised?
- Will the migration include multilingual content?
- Will user accounts be migrated?
For SEO, URL decisions are especially important. If article aliases, menu aliases or category aliases change, you may need redirects. A migration can improve site structure, but it should not accidentally destroy existing search rankings by changing important URLs without a plan.
Create a Migration Timeline
Finally, define a realistic timeline. A small Joomla site may be migrated quickly, but a larger website with many extensions and thousands of articles should be planned in stages.
A practical migration timeline could look like this:
- Day 1: Audit Joomla version, server, extensions and template.
- Day 2: Create backup and staging site.
- Day 3: Update extensions and test compatibility.
- Day 4: Export and clean content where needed.
- Day 5: Perform migration on staging.
- Day 6: Test frontend, administrator, forms, menus and SEO.
- Day 7: Repeat the final migration on the live site or launch the migrated staging copy.
The exact timeline depends on the size and complexity of the website, but the principle is always the same: plan first, test safely, then migrate the live site only when you know what to expect.
Phase 2: Create a Backup and Staging Site
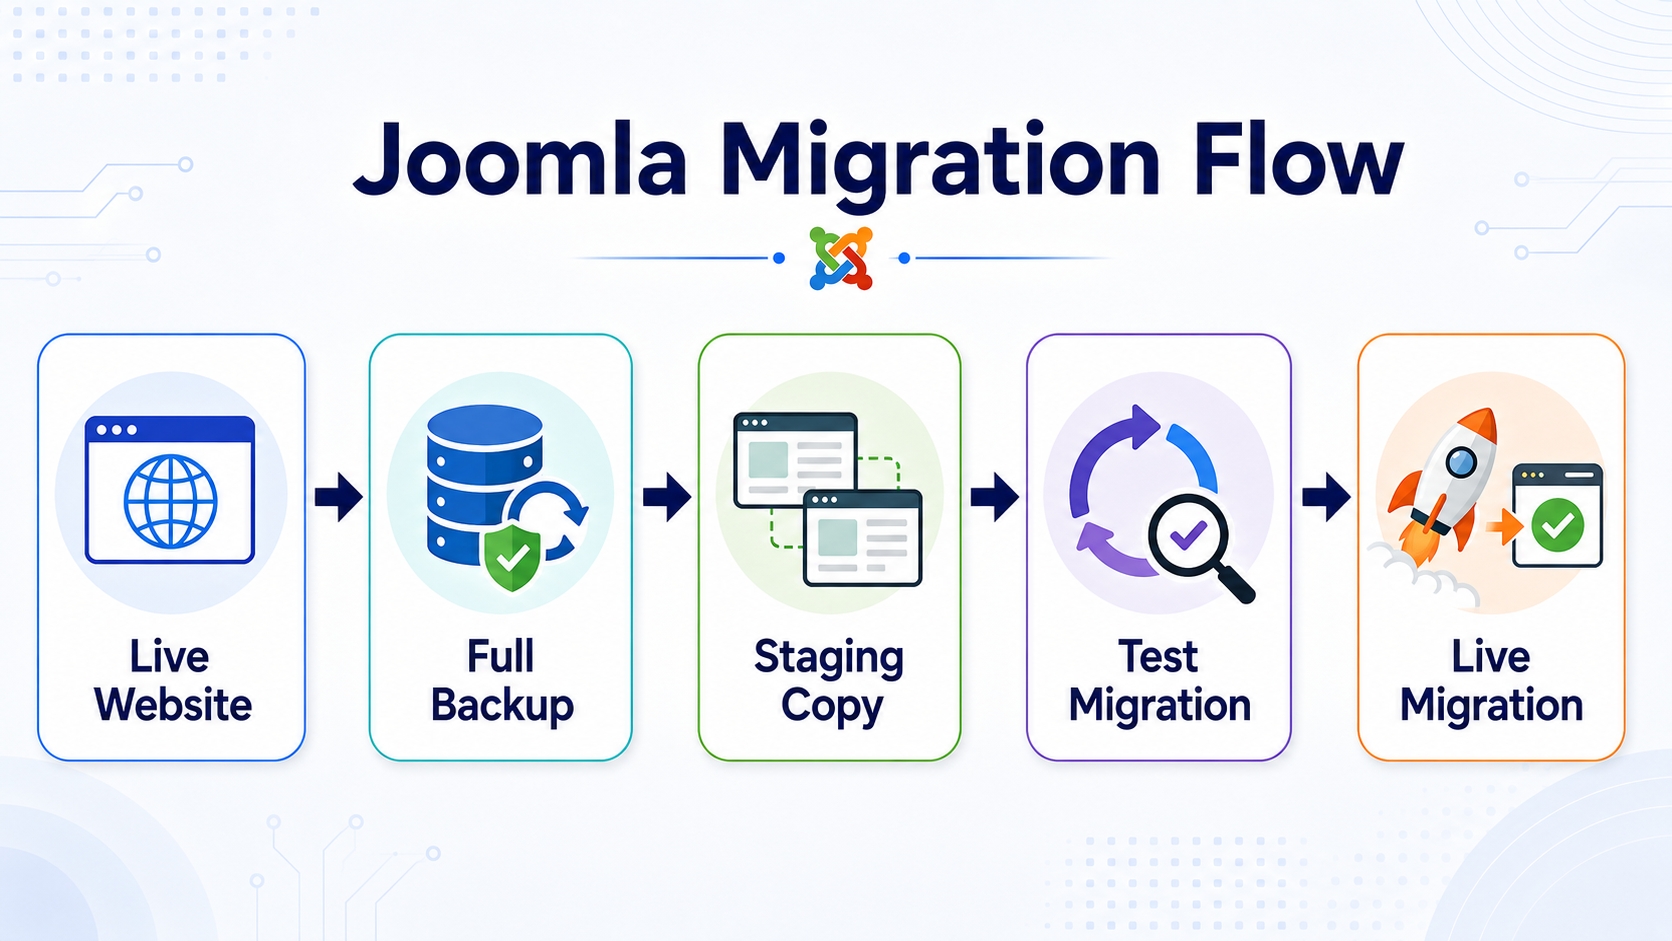
Once the migration is planned, the next step is to create a safe recovery path. Never begin a Joomla migration without a complete backup and, whenever possible, a staging copy of the website.
A backup protects you if something goes wrong. A staging site allows you to discover problems before they affect visitors. Together, they turn a risky migration into a controlled process.
Create a Full Joomla Backup
Your backup should include both the website files and the database. Backing up only the files is not enough, because Joomla stores articles, categories, users, menu items, modules, extension settings and many other important records in the database.
A complete Joomla backup should include:
- All Joomla files and folders
- The full database
- The configuration.php file
- Images and media files
- Custom template files
- Custom scripts or modified extension files
- .htaccess, web.config or nginx configuration snippets
Popular backup methods include:
- Akeeba Backup: A widely used Joomla backup extension that creates a complete site archive.
- Plesk Backup Manager: Useful when the site is hosted on a Plesk server and you want a hosting-level backup.
- cPanel backups: Useful on cPanel-based hosting environments.
- Manual file and database backup: Download the files by FTP/SFTP and export the database using phpMyAdmin, Adminer, MySQL client or another database tool.
- Server snapshots: Useful on VPS or cloud hosting, but should not be your only backup if you also need portable Joomla restoration.
For most website owners, Akeeba Backup is the easiest solution. For developers or server administrators, a combination of file backup, database export and hosting-level backup provides additional safety.
Verify That the Backup Can Be Restored
A backup is only useful if it can be restored. Before starting the migration, make sure you know how to restore the website if needed.
At minimum, confirm:
- The backup completed successfully.
- The backup file is stored outside the live website.
- The database export is not empty or corrupted.
- You know which database belongs to the website.
- You have access to hosting, FTP/SFTP and database tools.
- You know how to restore the files and database.
If the website is important, test the backup by restoring it to a temporary location or staging domain. This is the best way to find out whether your backup process actually works.
Do not store the only copy of your backup inside the same Joomla installation that you are about to upgrade. Download it to your computer or move it to secure external storage.
Create a Staging Copy of the Website
A staging site is a private copy of your live website where you can test the migration safely. It can be placed on a subdomain, a development domain or a local development environment.
Common staging locations include:
- staging.example.com
- dev.example.com
- A password-protected folder on the same server
- A local environment using Docker, DDEV, MAMP, XAMPP or similar tools
- A separate hosting account or VPS
The staging site should be as close to the live website as possible. Ideally, it should use the same PHP version, database type, web server configuration and file permissions that you plan to use after migration.
If the staging server differs too much from the live server, you may miss problems that only appear later during launch.
Protect the Staging Site from Search Engines
A staging website should not be indexed by Google. If search engines index your staging copy, you may create duplicate content problems or expose unfinished work.
Protect the staging site by using one or more of the following methods:
- Password-protect the staging domain at server level.
- Set the Joomla site offline while testing.
- Use a robots.txt rule to discourage crawling.
- Use noindex headers or meta tags where appropriate.
Server-level password protection is usually the safest option because it prevents both visitors and bots from accessing the staging copy.
Update Configuration for the Staging Site
After copying the website, adjust the staging configuration so that it does not interfere with the live site.
Check the following:
- Database name, database user and password
- Log and temporary folder paths
- Cache settings
- Email sending settings
- Payment gateway test mode
- Analytics tracking
- Cron jobs and scheduled tasks
- Third-party API integrations
This step is especially important for ecommerce websites, membership websites and websites with automated imports or email notifications. You do not want the staging site to send real emails, process real payments or overwrite live data.
Disable Scheduled Tasks During Testing
Before performing the migration on staging, temporarily disable scheduled tasks that could modify the database while you are testing.
Examples include:
- Automated article imports
- Product synchronisation
- Newsletter synchronisation
- CRM integrations
- Payment status updates
- External API imports
- Backup jobs that may overwrite test files
This gives you a stable test environment. Once the migration has been completed and verified, you can re-enable the tasks one by one.
Use the Staging Site to Test the Full Migration
The staging site should be used for the complete migration process, not only for a quick visual check. Perform the same steps you plan to perform on the live site:
- Update Joomla to the latest version of the current major release.
- Update all compatible extensions.
- Disable or remove incompatible extensions.
- Switch PHP version where required.
- Perform the Joomla upgrade step by step.
- Fix database issues.
- Test the frontend and administrator.
- Check forms, menus, modules, search, login and custom fields.
- Review SEO-critical URLs.
Document every problem you find and how you fixed it. This migration log becomes extremely useful when you repeat the process on the live website.
Prepare Content Safely on Staging
If your migration includes content cleanup, staging is the best place to test it. For example, you can export Joomla articles, update them in Excel or CSV, and import the improved content back into the staging site before touching the live website.
With Content Uploader Pro, this workflow is useful when you want to:
- Clean article titles and aliases
- Update meta descriptions
- Move articles into new categories
- Standardise publishing states
- Update intro images and full article images
- Populate or clean custom fields
- Prepare content for a new Joomla structure
Testing this on staging first allows you to confirm that the imported data behaves exactly as expected. Once the process is verified, you can repeat it with confidence on the live site or on the final migrated copy.
Decide How the Final Launch Will Work
Before continuing, decide how the migrated version will eventually go live. There are two common approaches.
Option 1: Repeat the migration on the live site. This works when the migration is simple and the staging test has shown exactly which steps are required. Before doing this, create a fresh backup of the live site.
Option 2: Replace the live site with the migrated staging site. This can be better for complex migrations, especially if many fixes and content changes were made on staging. However, you must be careful if the live site continues to receive new articles, orders, users, form submissions or other database changes while staging is being prepared.
For content-heavy websites, plan this carefully. You may need a content freeze before launch, or a final export/import step to bring the latest articles into the migrated version.
The goal of Phase 2 is simple: before changing the live website, you should have a complete backup, a working staging copy and a tested migration process. Once these are in place, you can continue with the most valuable part of the project: preparing and improving your Joomla content before the final migration.
Phase 3: Prepare and Optimise Your Joomla Content
Once your backup and staging site are ready, the next major step is content preparation. This is one of the most valuable parts of a Joomla migration, especially when moving from Joomla 3 to Joomla 6.
Many Joomla migration checklists focus heavily on PHP versions, extensions and templates. These are important, but they are not the whole story. For most websites, the real value is in the content: articles, categories, metadata, aliases, images, custom fields, menu relationships and publishing settings.
If you simply upgrade the website without reviewing the content, you may successfully migrate Joomla but also carry years of old problems into the new version. A migration is the perfect opportunity to clean, restructure and improve your content before or after the technical upgrade.
Why Content Preparation Matters During a Joomla Migration
Older Joomla websites often grow organically over many years. Different administrators may have added content using different naming styles, category structures, image formats and metadata conventions. Over time, this can create a content database that technically works but is difficult to manage.
Common content problems before a Joomla migration include:
- Outdated articles that are no longer relevant
- Duplicate or near-duplicate content
- Inconsistent article titles
- Unclear or duplicated aliases
- Old categories that are no longer used
- Articles assigned to the wrong categories
- Missing meta descriptions
- Weak browser page titles
- Broken intro images or full article images
- Unused custom fields
- Inconsistent publishing states
- Old featured articles that should no longer be featured
- Incorrect author assignments
- Content that should be archived instead of migrated
Cleaning these issues manually inside the Joomla administrator can be very time-consuming. Editing hundreds or thousands of articles one by one is slow, repetitive and prone to mistakes.
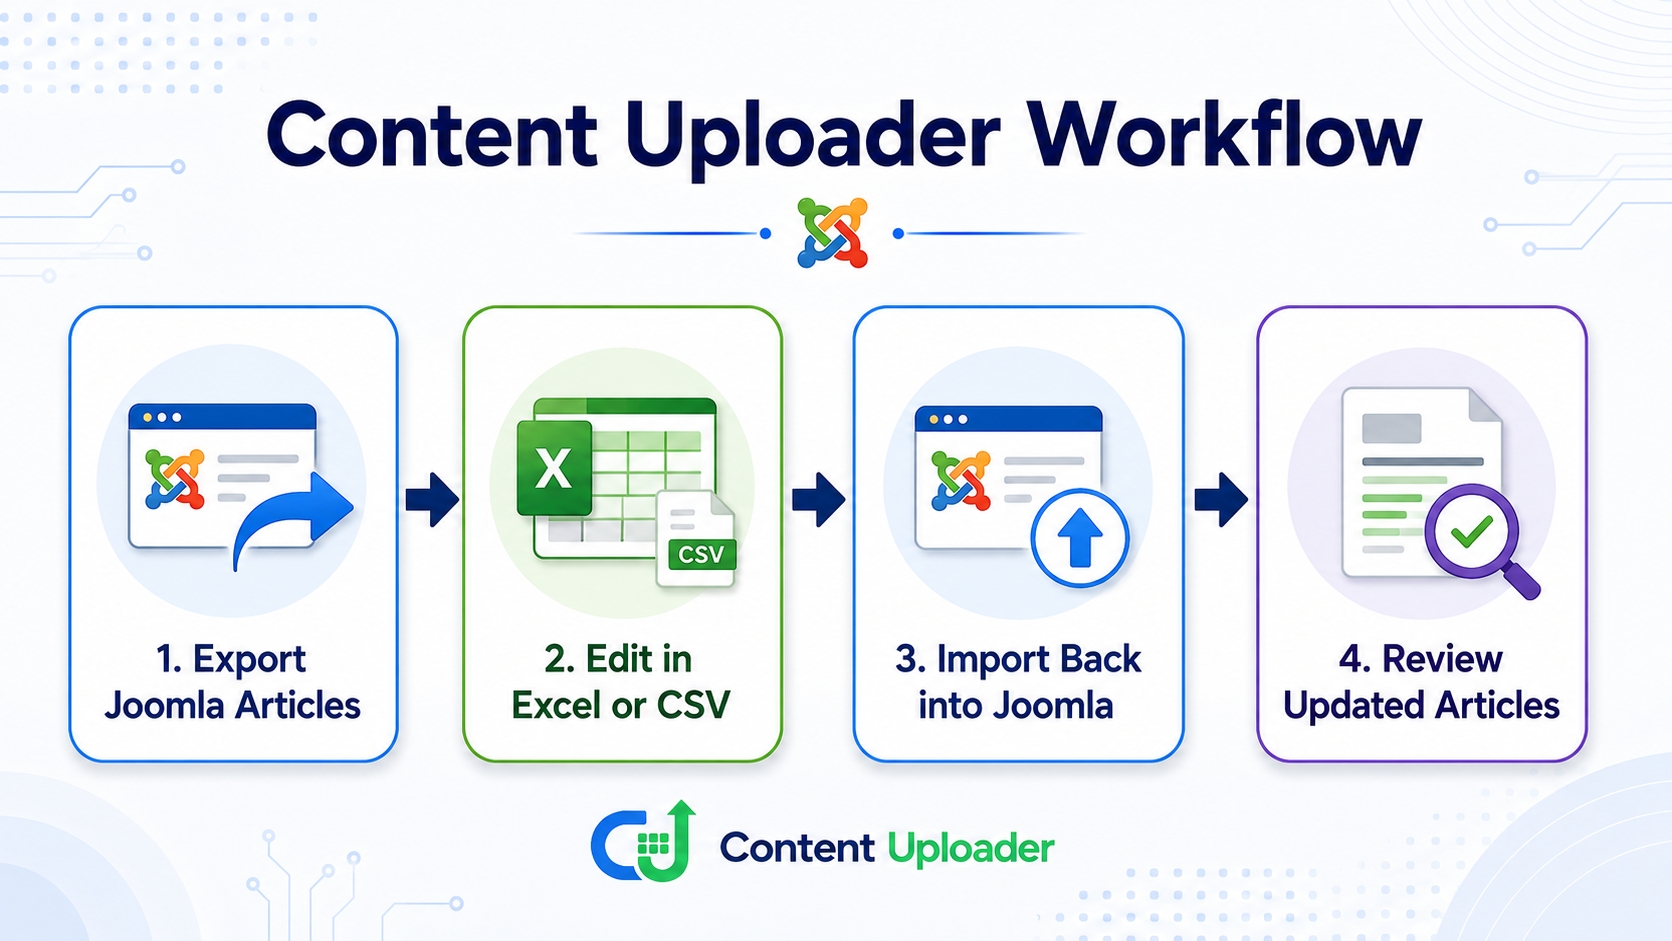
This is where a spreadsheet-based content workflow becomes extremely useful. Instead of opening each article manually, you can export your content to Excel or CSV, review it in bulk, make structured changes, and import the improved content back into Joomla.
Use the Migration as a Content Cleanup Opportunity
A Joomla migration should not only answer the question: How do we move this site to a newer Joomla version?
It should also answer:
- Which content is still useful?
- Which articles should be updated?
- Which pages should be removed or archived?
- Which categories should be merged?
- Which URLs must be preserved?
- Which metadata should be improved?
- Which articles need better images?
- Which custom fields should be populated?
- Which content should support SEO landing pages?
This content review can improve both user experience and SEO. A cleaner content structure makes the website easier to navigate, easier to maintain and easier for search engines to understand.
Export Joomla Articles to Excel or CSV
For content-heavy websites, the first practical step is to export your existing Joomla articles. With Content Uploader Pro, you can export Joomla content to Excel or CSV and review the data outside the Joomla administrator.
This is useful because spreadsheets make it much easier to scan, filter, sort and update large amounts of content. You can quickly identify outdated articles, duplicated titles, missing metadata, inconsistent category assignments and other issues that are difficult to spot when editing articles one by one.
Typical fields you may want to review include:
- Article ID
- Title
- Alias
- Category
- Published state
- Featured state
- Access level
- Language
- Intro text
- Full text
- Meta title
- Meta description
- Meta keywords, if still used
- Intro image
- Full article image
- Custom fields
- Created date
- Modified date
- Author
Once the content is in a spreadsheet, you can work much faster. For example, you can filter all articles with missing meta descriptions, sort by category, find outdated titles, check which articles are unpublished, or identify old content that should not be migrated.
Decide What Content Should Be Migrated
Not every article needs to move to the new Joomla website. Some content may be outdated, irrelevant or harmful to the quality of the site.
Before importing or migrating content, group your articles into practical categories:
| Content Type | Recommended Action |
|---|---|
| Important evergreen pages | Keep, review and improve |
| High-traffic SEO articles | Keep URLs stable and improve metadata |
| Outdated news posts | Archive or remove if no longer useful |
| Duplicate articles | Merge, redirect or delete |
| Thin content | Improve, merge or remove |
| Old landing pages | Review for SEO value before changing URLs |
| Internal test articles | Remove before migration |
This step helps prevent the new Joomla website from becoming a copy of the old website with all the same problems. A migration should reduce clutter, not preserve it unnecessarily.
Clean Up Article Titles and Aliases
Article titles and aliases are especially important during migration. Titles affect how users understand your content. Aliases often affect Joomla URLs, depending on your menu structure and routing settings.
Before changing aliases, check whether the current URLs are already indexed by search engines or linked from other websites. If an alias change causes a URL change, you may need a redirect.
In a spreadsheet, you can quickly review article titles and aliases side by side. This makes it easier to spot problems such as:
- Aliases with old dates
- Aliases with spelling mistakes
- Duplicated aliases
- Overly long aliases
- Titles that no longer match the content
- Inconsistent naming conventions
For example, an old article title such as:
Joomla Migration Service 2020
may be better updated to:
Joomla Migration Checklist for Joomla 3, 4, 5 and 6
However, if the old URL receives traffic, you should plan a redirect before changing the alias.
Review and Improve Metadata
Joomla migrations are a good time to improve article metadata. Many older websites contain missing, duplicated or weak meta descriptions. While meta descriptions are not a direct ranking guarantee, they can influence how pages appear in search results and whether users choose to click.
In your exported spreadsheet, review:
- Browser page title
- Meta description
- Robots settings
- Canonical handling, if managed by your extensions or template
- Open Graph data, if used
A practical metadata review could look like this:
| Issue | Example | Recommended Fix |
|---|---|---|
| Missing meta description | Empty field | Add a concise summary of the article |
| Duplicated meta description | Same text used on many pages | Write unique descriptions for important pages |
| Outdated title | Mentions old Joomla version only | Update to match current search intent |
| Too generic | Welcome to our website | Describe the actual page value |
With Content Uploader Pro, these updates can be prepared in Excel or CSV and imported back into Joomla in bulk. This is much faster than opening every article individually.
Reorganise Categories Before or After Migration
Many Joomla 3 websites contain category structures that made sense years ago but no longer reflect the current website. A migration is a good time to simplify the structure.
Before changing categories, review how they are used by:
- Menu items
- Blog layouts
- Category list pages
- Modules
- Breadcrumbs
- Search filters
- Access rules
- SEO URLs
Category changes can affect frontend URLs, especially if your Joomla routing includes category aliases. For important pages, check whether changing the category will change the URL. If yes, prepare redirects before launch.
Using a spreadsheet, you can quickly assign many articles to new categories. This is especially helpful when consolidating an old website structure into a cleaner Joomla 6 structure.
Example category cleanup:
| Old Category | New Category | Reason |
|---|---|---|
| News 2018 | Archive | Old time-based category no longer needed |
| Joomla Tips | Joomla Guides | Clearer topic grouping |
| Uncategorised | Support Articles | Improves structure and navigation |
Check Article Images and Media Paths
Article images often cause problems during Joomla migrations. Images may be missing, stored in inconsistent folders, linked with old paths or referenced directly inside article text.
Review both:
- Intro images
- Full article images
- Images inserted directly into article content
- Image alt text
- Image captions
- Image file names
Common image issues include:
- Broken image paths
- Images stored in old temporary folders
- Very large unoptimised images
- Missing alt text
- Duplicated image files
- Mixed HTTP and HTTPS image URLs
Before migration, decide whether images should be reorganised into cleaner folders. If image paths change, make sure the article data is updated accordingly.
For large websites, Content Uploader Pro can help prepare or update image references in bulk, especially when article image fields need to be standardised across many records.
Review Custom Fields
Custom fields are often important in modern Joomla websites. They may store structured information such as product details, author data, download links, specifications, locations, dates or additional article metadata.
Before migration, check:
- Which custom fields are currently used
- Which field groups exist
- Which categories use each field group
- Whether fields are still relevant
- Whether field names are clear
- Whether old fields can be removed
- Whether new fields should be added after migration
If your Joomla 6 structure will rely more heavily on custom fields, the migration is a good time to populate them properly. This can be done more efficiently with a spreadsheet workflow than by manually editing individual articles.
For example, you may want to add or update fields such as:
- Product type
- Difficulty level
- Download URL
- Video URL
- Article status
- Migration notes
- Internal priority
Prepare Multilingual Content Carefully
If your Joomla website uses multiple languages, content preparation becomes even more important. You should check language assignments, associations, menu items and translated metadata before and after migration.
For multilingual websites, review:
- Article language settings
- Category language settings
- Menu language settings
- Language associations
- Translated aliases
- Translated metadata
- Language switcher behaviour
Do not assume that translated content will automatically remain connected in the way users expect. Test language switching on staging and verify that each important page points to the correct translated version.
Preserve Important URLs
One of the biggest SEO risks during migration is accidental URL change. Joomla URLs can be influenced by menu items, aliases, categories, routing settings and SEF configuration.
Before migration, export or crawl your most important URLs. These may include:
- Pages with organic search traffic
- Pages with backlinks
- Pages used in advertising campaigns
- Product or service pages
- Popular articles
- Download pages
- Support documentation
For these important URLs, decide whether they should remain unchanged or redirect to improved versions. Avoid changing URLs unless there is a clear reason.
If URLs must change, prepare 301 redirects before launch. This helps users and search engines find the new location of the content.
Create a Content Migration Spreadsheet
For larger projects, it helps to create a dedicated content migration spreadsheet. This can be based on your exported Joomla articles and expanded with planning columns.
Useful planning columns include:
| Column | Purpose |
|---|---|
| Current URL | Records the existing page address |
| New URL | Records the planned new address, if changed |
| Migration action | Keep, update, merge, redirect, archive or delete |
| SEO priority | Marks important pages that need careful handling |
| New category | Defines the future category assignment |
| Meta description status | Shows whether metadata is missing or complete |
| Image status | Shows whether article images need attention |
| Notes | Stores migration decisions or issues |
This planning file becomes a central reference during the migration. It also helps agencies, developers and content editors work together without losing track of decisions.
Import Cleaned Content Back Into Joomla
After reviewing and improving the exported data, you can import the cleaned content back into Joomla. This can be done on the staging site first, so you can confirm that the result is correct before applying the same workflow to the live or final migrated website.
With Content Uploader Pro, this workflow can support common migration tasks such as:
- Creating new Joomla articles from Excel or CSV
- Updating existing Joomla articles in bulk
- Changing category assignments
- Updating aliases
- Adding or improving meta descriptions
- Updating intro text and full text
- Assigning article images
- Populating custom fields
- Preparing content for Joomla 4, Joomla 5 or Joomla 6
This is especially useful for Joomla 3 to Joomla 6 projects where the content structure needs to be modernised. Instead of treating migration as a purely technical task, you can use it to improve the quality, consistency and SEO value of the website.
Content Preparation Checklist
Before continuing to the actual Joomla migration, use this checklist:
- Export important Joomla content to Excel or CSV.
- Review all article titles.
- Check aliases and identify URL risks.
- Remove or archive outdated content.
- Merge duplicate or thin articles where appropriate.
- Review category assignments.
- Improve missing or weak meta descriptions.
- Check intro images and full article images.
- Review custom fields and field groups.
- Check multilingual content associations if applicable.
- Prepare redirects for changed URLs.
- Test content imports on the staging site first.
- Document all major content decisions.
Why This Step Saves Time Later
Content preparation may feel like extra work at the beginning, but it usually saves time later. A clean content structure makes the technical migration easier to test, reduces the number of post-migration fixes and improves the final quality of the website.
It also creates a natural quality checkpoint. Instead of asking only whether the website has been upgraded, you can ask whether the new Joomla website is better than the old one.
For many websites, this is where Content Uploader Pro provides the most value. It turns Joomla content migration and cleanup into a structured spreadsheet workflow, making it easier to prepare large amounts of article data before moving fully to Joomla 6.
Phase 4: Perform the Joomla Migration
After planning the migration, creating a backup, preparing a staging site and reviewing your content, you can begin the technical Joomla migration. This is the stage where Joomla itself is upgraded from one major version to the next.
The exact process depends on your starting version. A Joomla 5 website moving to Joomla 6 is usually much simpler than a Joomla 3 website moving to Joomla 6. Joomla 3 migrations require more care because they often involve older extensions, older templates, older PHP versions and a bigger change in Joomla architecture.
The safest approach is to perform the full migration on your staging site first. Do not begin with the live website unless you have no other option and you have a complete, tested backup.
Start With the Latest Version of Your Current Joomla Branch
Before moving to the next major Joomla version, update your current website to the latest available version in its current branch.
For example:
- If you are on Joomla 3, update to Joomla 3.10.12
- If you are on Joomla 4, update to Joomla 4.4.14
- If you are on Joomla 5, update to the latest Joomla 5 version
This step is important because late versions of each Joomla branch often contain compatibility checks, database fixes and migration preparation improvements. Starting from an outdated minor version increases the chance of failed updates.
Update All Compatible Extensions First
Before upgrading Joomla itself, update all extensions that are compatible with your current Joomla version and required for the migration.
Check:
- Components
- Modules
- Plugins
- Templates
- Template frameworks
- Libraries
- Packages
Pay special attention to system plugins. A broken system plugin can prevent the administrator area from loading after the migration. If you are unsure whether an old plugin is required, test disabling it on staging before the migration.
Do not update extensions blindly on the live site. Some extensions require a specific update order, especially ecommerce extensions, page builders, form builders and template frameworks.
Disable or Remove Incompatible Extensions
If an extension is not compatible with the target Joomla version, decide what to do before upgrading.
| Extension Status | Recommended Action |
|---|---|
| Compatible update available | Update before migration |
| Compatible version available only for the target Joomla version | Follow the developer's migration instructions |
| No longer used | Uninstall before migration |
| Not compatible and still required | Find a replacement before migration |
| Custom extension | Test and update the code before migration |
Uninstalling unused extensions before migration is usually better than simply disabling them. Disabled extensions can still leave database tables, plugins, files or update sites behind. If the extension is no longer needed, remove it cleanly while the old Joomla version is still working.
Check Joomla Update Settings
In the Joomla administrator, open the Joomla Update component and confirm that the correct update channel is selected for your migration path.
Depending on your current version, you may need to change the update channel from the default setting to a channel that allows the next major version to appear. On older Joomla versions, this was often done through the Joomla Update options.
Before clicking update, read the pre-update check carefully. Joomla may warn you about:
- PHP version problems
- Database version problems
- Missing PHP extensions
- Potentially incompatible extensions
- Write permission problems
- Update package issues
Do not ignore warnings just to continue faster. The pre-update check exists to prevent avoidable migration failures.
Switch PHP Version at the Right Time
PHP version changes are often required during Joomla migrations. However, changing PHP too early can break the old site before you are ready to migrate.
For example, a Joomla 3 site may currently run on an older PHP version, while Joomla 6 requires a much newer PHP version. Some Joomla 3 extensions may not run correctly under modern PHP versions. This means you may need to test PHP changes carefully on staging and switch versions only when the migration step requires it.
A practical approach is:
- Keep the current PHP version while preparing the old Joomla site.
- Update Joomla and extensions as far as possible on the existing version.
- Switch PHP on the staging site when the next Joomla version requires it.
- Fix any PHP errors before continuing.
- Repeat the same tested sequence during the final migration.
If the site shows a blank page after switching PHP, check the PHP error log. The problem is often an old plugin, template override or custom script.
Migrate Step by Step
For Joomla 3 to Joomla 6 projects, avoid thinking of the migration as one large jump. A safer process is to migrate step by step and test after each major upgrade.
A practical sequence may look like this:
- Update Joomla 3 to the latest Joomla 3.10 version.
- Update all Joomla 3-compatible extensions.
- Remove unused or incompatible extensions.
- Check the pre-update information for Joomla 4.
- Migrate from Joomla 3.10 to Joomla 4.
- Fix administrator, database and extension issues.
- Update Joomla 4 to the latest Joomla 4.4 version.
- Update extensions again.
- Upgrade from Joomla 4.4 to Joomla 5.
- Test the website again.
- Upgrade from Joomla 5 to Joomla 6 when all requirements are met.
This process may look longer, but it is usually safer than trying to force a direct jump. Each stage gives you a chance to identify problems while they are still easier to understand.
Watch for Database Fixes After Each Upgrade
After each major Joomla upgrade, check whether Joomla reports database issues. In the administrator area, review the database status and apply fixes if Joomla recommends them.
Database problems can affect menus, assets, extensions, categories, content records and administrator functionality. If Joomla shows database warnings after an upgrade, do not continue to the next major version until those warnings are resolved.
Also check whether any extensions require their own database update steps. Some components install migration scripts, while others require you to open the component or save its configuration after upgrading.
Check Administrator Access Immediately
After each upgrade step, log out and log back into the Joomla administrator. Confirm that you can access the main areas of the backend.
Check:
- Dashboard
- Article Manager
- Category Manager
- Menu Manager
- Module Manager
- Plugin Manager
- Extension Manager
- Global Configuration
- Media Manager
If the administrator area breaks, fix that problem before continuing. Do not continue upgrading if the backend is already unstable.
Check the Frontend After Each Major Step
After confirming that the administrator works, check the frontend. At this stage, you are not doing a full quality assurance review yet. You are checking whether the site loads and whether major areas are still functional.
Open several types of pages:
- Homepage
- Single article pages
- Category blog pages
- Contact pages
- Search pages
- Login pages
- Important landing pages
- Pages using custom modules
- Pages using third-party components
If only one page type is broken, the issue may be a template override, menu item type or extension. If the whole site is broken, check PHP errors, system plugins and template compatibility first.
Common Joomla Migration Problems
Most Joomla migration problems fall into predictable categories. Knowing these in advance makes troubleshooting easier.
| Problem | Likely Cause | What to Check |
|---|---|---|
| Blank page after upgrade | PHP fatal error | PHP error log, old plugins, template overrides |
| Administrator does not load | System plugin or extension conflict | Disable recently updated third-party plugins on staging |
| Frontend layout broken | Template or override incompatibility | Template framework, override files, Bootstrap markup |
| Menus show errors | Missing component or old menu item type | Menu item configuration and component compatibility |
| Articles load but images are missing | Image path or media issue | Intro image, full article image and content image paths |
| Forms stop sending email | Mail configuration or form extension issue | Global mail settings, SMTP, form extension logs |
| Update times out | Server limits too low | PHP execution time, memory limit, file permissions |
When troubleshooting, change one thing at a time and document what you changed. Randomly enabling, disabling or reinstalling extensions can make the problem harder to understand.
Use Error Logs During Migration
Error logs are essential during a Joomla migration. A blank page or generic error message usually does not tell you enough. The actual reason is often visible in the PHP error log or Joomla log files.
Useful places to check include:
- Joomla log folder
- PHP error log
- Apache or Nginx error log
- Hosting control panel logs
- Browser developer console
If you use Plesk, the domain log browser can be useful for checking recent PHP and web server errors. If you manage the server directly, check the relevant web server and PHP-FPM logs.
When you find an error, look for the file path mentioned in the message. It often points directly to the extension, plugin, template or override causing the problem.
Do Not Fix Content Manually During the Technical Upgrade
During the actual Joomla upgrade process, avoid making large manual content changes at the same time. Keep the technical migration and content cleanup as separate as possible.
For example, do not upgrade Joomla, rewrite hundreds of articles, change categories and restructure menu items all at once without tracking what changed. If something breaks, it becomes difficult to know whether the cause was the Joomla upgrade, an extension update, a category change or a content edit.
A better approach is:
- Prepare content changes in a spreadsheet.
- Run the technical migration on staging.
- Verify that the migrated site works.
- Import or apply content improvements in a controlled step.
- Test again.
This is one of the reasons Content Uploader Pro is useful during migration projects. It allows content updates to be prepared, reviewed and applied as a separate structured workflow instead of mixing hundreds of manual edits into the upgrade process.
Document the Migration Steps
As you perform the migration on staging, keep a simple migration log. This does not need to be complicated, but it should record the important steps and fixes.
Your migration log can include:
- Date and time of each migration step
- Joomla version before and after each upgrade
- PHP version used at each stage
- Extensions updated
- Extensions disabled or removed
- Errors found
- Fixes applied
- Database fixes performed
- Template changes made
- Content imports or exports performed
This log becomes your repeatable process for the live migration. Instead of trying to remember what worked on staging, you can follow the same tested sequence.
Prepare for the Final Live Migration
Once the staging migration has been completed successfully, decide how to apply it to the live website.
There are two common options:
| Launch Method | Best For | Important Risk |
|---|---|---|
| Repeat the migration on the live site | Smaller sites or simple migrations | You must repeat all steps accurately |
| Replace live site with migrated staging site | Complex migrations with many fixes | Live content changes may be lost if not synced |
If the live website receives new articles, user registrations, orders, form submissions or comments, you need a plan for that data. You may need a short content freeze, a final database sync, or a final export and import of new content before launch.
For content-heavy Joomla sites, Content Uploader Pro can help with the final content sync when articles need to be exported from one Joomla installation and imported into another. This can be useful if your staging site is already migrated and cleaned, but the live site has received new or updated articles during the preparation period.
Migration Execution Checklist
Before moving on to full post-migration testing, confirm the following:
- The current Joomla branch was updated to its latest version before the major upgrade.
- All required extensions were updated.
- Unused extensions were removed.
- Incompatible extensions were disabled, replaced or handled according to developer instructions.
- The required PHP version was tested on staging.
- The Joomla upgrade was performed step by step.
- The administrator area loads correctly after each major upgrade.
- The frontend loads correctly after each major upgrade.
- Database warnings were checked and fixed.
- Error logs were reviewed.
- The migration process was documented.
- Content changes were kept separate from technical upgrade steps where possible.
- The final launch method was chosen.
At this point, the website may be technically migrated, but the project is not finished. A migrated Joomla site still needs detailed testing. The next phase is to verify that the frontend, administrator, extensions, forms, menus, content, SEO and performance all work correctly before the new version is considered ready.
Phase 5: Test the Migrated Joomla Website
After the technical migration is complete, the website may appear to be working, but that does not mean the migration is finished. A Joomla migration should always be followed by structured testing. This is where you confirm that the frontend, administrator, content, extensions, templates, forms, users and SEO-critical pages all behave correctly.
Testing should be done first on the staging site. Only after the migrated staging site passes your checks should you repeat the process on the live website or replace the live website with the migrated version.
Start With a Visual Frontend Review
Begin by browsing the website like a normal visitor. Do not only check the homepage. A Joomla website often uses different layouts for articles, category blogs, contact forms, modules, search results and extension-based pages. One page type may work correctly while another is broken.
Check the following frontend areas:
- Homepage
- Main menu pages
- Single article pages
- Category blog pages
- Featured article layouts
- Contact pages
- Search results
- Login and registration pages
- User profile pages, if used
- Download pages
- Landing pages
- Multilingual pages, if used
- Pages powered by third-party components
Look for layout issues, missing modules, broken images, incorrect typography, JavaScript errors, missing buttons, broken forms and pages that display error messages.
Compare Important Pages With the Old Website
If possible, compare the migrated website with the old website. This does not mean every page must look exactly the same, especially if you are redesigning the website, but important content and functionality should still be present.
For important pages, compare:
- Page title
- Main heading
- Article content
- Images
- Modules
- Menu position
- Metadata
- Canonical URL handling
- Structured data, if used
- Internal links
- Call-to-action buttons
This is especially important for pages that already receive search traffic. If a high-performing page loses content, metadata, internal links or structured data during migration, it can affect SEO performance after launch.
Test Joomla Article Pages
Articles are the core content type on many Joomla websites. After migration, test different article types, not only one or two examples.
Review articles from different categories and check:
- The article title displays correctly.
- The alias is correct.
- The article content is complete.
- Intro text and full text appear as expected.
- Intro images and full article images load correctly.
- Image alt text and captions are still present where used.
- Custom fields display correctly.
- Publishing status is correct.
- Featured articles are still featured where required.
- Article ordering is correct.
- Author and date display settings are correct.
- Internal links inside article text still work.
If you used Content Uploader Pro during the preparation phase, check both newly imported articles and updated existing articles. Confirm that the imported values appear correctly in the Joomla administrator and on the frontend.
Test Categories and Blog Layouts
Category pages are easy to overlook, but they are often important for navigation and SEO. After migration, open each important category page and check whether the correct articles appear.
Check:
- Category titles
- Category descriptions
- Article ordering
- Pagination
- Intro images
- Read more links
- Number of leading articles
- Number of intro articles
- Module positions around category layouts
- Empty categories that should contain articles
If articles were moved into new categories during the migration, this step is especially important. Make sure the new category structure works for visitors and does not accidentally hide important content.
Test Menus and Navigation
Menus control much of the Joomla frontend structure. A menu item may point to an article, a category, a contact form, a component view or a custom URL. During migration, old menu item types can break if the related component no longer exists or has changed.
Check every main navigation item and any important footer or sidebar menus.
| Menu Check | What to Confirm |
|---|---|
| Main menu | All important items load correctly |
| Dropdown menus | Submenus open and link to correct pages |
| Footer menu | Support, legal and resource links still work |
| Hidden menu items | SEO landing pages and alias-based routes still work |
| External links | Links open correctly and use the intended target behaviour |
Pay close attention to hidden menus. Joomla websites often use hidden menu items to control URLs, page titles, metadata and module assignment. If hidden menu items are missing or broken, pages may still load but with different URLs or incorrect metadata.
Test Modules and Module Positions
Modules may behave differently after migration, especially if the template or template framework has changed. A module can disappear from the frontend if its position no longer exists, if menu assignment changed or if the module type is incompatible.
Review:
- Header modules
- Footer modules
- Sidebar modules
- Custom HTML modules
- Login modules
- Menu modules
- Search modules
- Breadcrumb modules
- Language switcher modules
- CTA and promotional modules
If the migrated website uses a new template, compare old and new module positions carefully. Some modules may need to be reassigned to new positions.
Test Contact Forms and Email Sending
Forms are business-critical on many websites. A migration can affect contact forms, quote request forms, registration forms, newsletter forms and ecommerce notification emails.
Test every important form from the frontend.
Check:
- The form loads correctly.
- Required fields work correctly.
- Validation messages appear correctly.
- Spam protection works.
- The form submits successfully.
- The confirmation message appears.
- The email is received by the correct recipient.
- The sender address and reply-to address are correct.
- Attachments work if the form allows uploads.
- Entries are saved in the component if applicable.
Also test Joomla's global mail configuration. If the server, PHP version or SMTP settings changed during migration, email sending may fail even though the website itself appears to work.
Test User Login and Permissions
If your Joomla website allows user login, membership access, frontend editing or restricted downloads, test permissions carefully. Access control issues are not always obvious from a quick frontend review.
Test different user groups, such as:
- Guest
- Registered user
- Author
- Editor
- Publisher
- Administrator
- Custom user groups
Check whether users can access only the content and functions they should be able to access. Also confirm that login, logout, password reset and registration workflows still work correctly.
Test Third-Party Extensions
Do not assume that an extension works just because it installed or updated successfully. Each important extension should be tested in the way real users or administrators use it.
Depending on your website, test:
- Ecommerce checkout
- Payment gateways
- Download systems
- Form builders
- Newsletter integrations
- Gallery components
- Page builders
- Search extensions
- SEO extensions
- Redirect components
- Membership extensions
- Booking or event systems
For each extension, test both the frontend and backend. For example, a gallery may display correctly on the frontend but fail when you try to upload a new image in the administrator.
Test Content Uploader Pro After Migration
If Content Uploader Pro is part of your migration workflow, test it on the migrated staging site before relying on it for final content updates.
Useful tests include:
- Export a small set of existing articles.
- Update article titles or metadata in the spreadsheet.
- Import the updated file back into Joomla.
- Confirm that existing articles were updated instead of duplicated.
- Test category assignment.
- Test intro image and full article image fields.
- Test custom field imports if used.
- Create one new test article from Excel or CSV.
- Delete the test article after confirming the workflow.
This confirms that your bulk content workflow works correctly on the new Joomla version. It is better to discover import configuration problems on staging than during the final live cleanup.
Check Media Manager and File Uploads
After migration, test the Joomla Media Manager and any extension-specific upload features. File permissions, folder paths and upload limits can change during migration, especially if the site was moved to a different server or PHP version.
Check:
- Media Manager opens correctly.
- Existing images are visible.
- New images can be uploaded.
- Folders can be created if needed.
- Image previews work.
- Allowed file types are correct.
- Upload size limits are sufficient.
- Files are stored in the expected folders.
If images are missing on the frontend but visible in Media Manager, check article image paths, template overrides and case sensitivity in file names. Some servers are stricter about uppercase and lowercase file names than others.
Check URLs and Redirects
URL testing is one of the most important post-migration SEO tasks. Even when the website looks correct, URLs may have changed because of routing settings, menu item changes, category changes or alias updates.
Create a list of important old URLs and test them against the migrated site.
Important URL types include:
- Homepage
- Main service or product pages
- High-traffic articles
- Pages with backlinks
- Landing pages
- Download pages
- Support pages
- Category pages
Each important URL should either load the correct page or redirect to the correct new page with a 301 redirect. Avoid redirecting everything to the homepage. That is poor for users and usually not ideal for SEO.
Run a Broken Link Check
After migration, run a broken link check on the staging site or live site. Broken links can appear because old articles were removed, categories changed, files moved or internal links still point to outdated URLs.
Check for:
- 404 pages
- Broken internal links
- Broken image URLs
- Broken download links
- Broken external links
- Redirect chains
- Links to staging URLs
- HTTP links on an HTTPS website
Links to staging URLs are especially important. Before launch, make sure no content, menu item, module or image path still points to the staging domain.
Check SEO Metadata
Migration can affect page titles, meta descriptions, robots settings and canonical tags. These should be checked before launch, especially on important pages.
Review:
- Browser page titles
- Meta descriptions
- Heading structure
- Canonical URLs
- Robots meta tags
- Open Graph tags
- Structured data
- XML sitemap
If you improved metadata during the content preparation phase, verify that the updated values are now visible in the page source. If metadata was imported with Content Uploader Pro, test several articles from different categories to confirm the import worked consistently.
Test Search and Filtering
If your Joomla website uses search, smart search, filtering or extension-specific search tools, test them after migration.
Check:
- Search forms appear correctly.
- Search results are relevant.
- New or updated content appears in search results.
- Old deleted content does not appear unexpectedly.
- Filters work correctly.
- Search indexing has been rebuilt if required.
If Joomla Smart Search is used, rebuild the search index after migration. This helps ensure that new, updated or imported content is searchable.
Test Mobile and Tablet Layouts
A Joomla migration can change CSS, JavaScript, template behaviour and module positions. Always test the migrated website on more than one screen size.
Check:
- Mobile navigation
- Dropdown menus
- Buttons and call-to-action elements
- Article readability
- Image scaling
- Tables
- Forms
- Checkout or registration steps
- Footer layout
Tables are a common issue on mobile. If your migrated content includes large tables, check whether they overflow or require responsive styling.
Check Browser Console Errors
Open the browser developer tools and check the console. JavaScript errors can break menus, sliders, forms, galleries, tabs, modals and tracking scripts.
Look for:
- JavaScript errors
- Missing files
- Mixed content warnings
- Blocked resources
- Deprecated scripts
- Tracking script errors
If interactive elements do not work after migration, JavaScript conflicts are a likely cause. This is common when templates, page builders or old plugins load outdated scripts.
Review Joomla and Server Logs
Even if the frontend appears to work, check the logs. Some migration issues only appear as warnings or errors that do not immediately break the page.
Review:
- Joomla logs
- PHP error logs
- Web server error logs
- Extension-specific logs
- Payment or form logs, if applicable
Fix repeated errors before launch where possible. A site that works visually but fills the PHP log with warnings may still have compatibility issues that should be addressed.
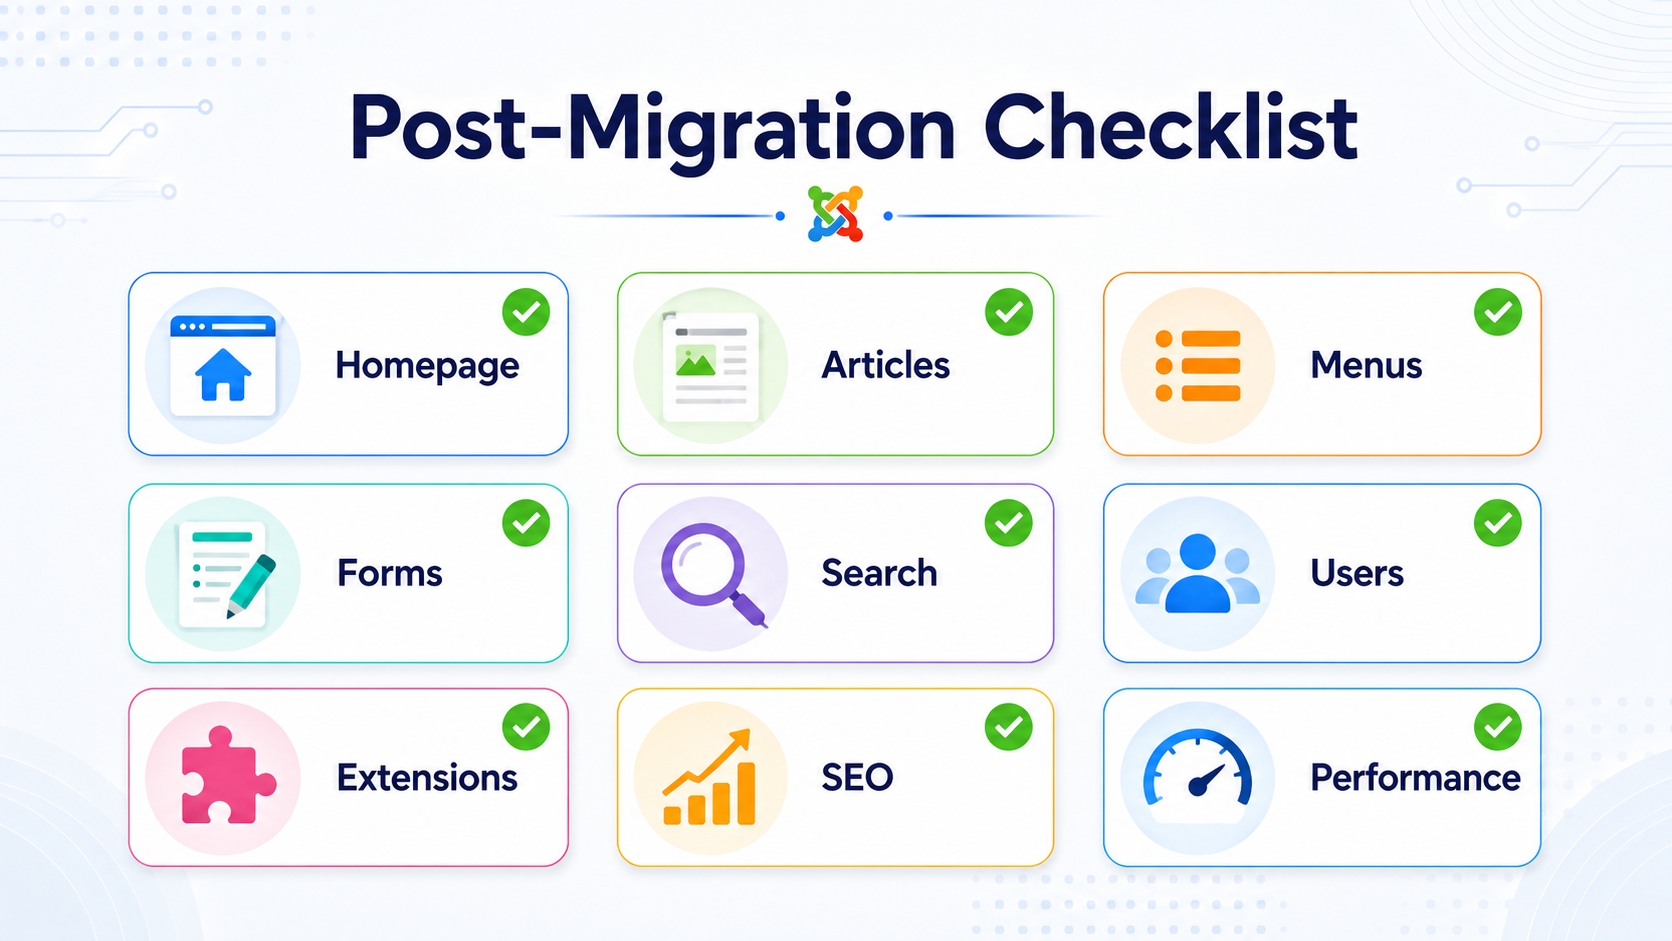
Create a Post-Migration Test Matrix
For larger websites, use a simple test matrix. This makes testing more structured and helps avoid missed areas.
| Area | Test | Status | Notes |
|---|---|---|---|
| Homepage | Loads correctly on desktop and mobile | Pending | |
| Articles | Content, images and metadata are correct | Pending | |
| Menus | All main and footer links work | Pending | |
| Forms | Submissions and emails work | Pending | |
| Extensions | Important components work frontend and backend | Pending | |
| SEO | Titles, meta descriptions, redirects and sitemap checked | Pending | |
| Performance | Page speed and caching checked | Pending |
This table can be copied into a spreadsheet or project management tool and expanded for your own website.
Post-Migration Testing Checklist
Before considering the migration complete, confirm the following:
- The homepage loads correctly.
- Important article pages work.
- Category blog pages display the correct articles.
- Main menu and footer menu links work.
- Hidden menu items still control important URLs where needed.
- Modules appear in the correct positions.
- Contact forms and email sending work.
- User login and permissions work.
- Third-party extensions work on frontend and backend.
- Content Uploader Pro export and import workflows work if used.
- Media Manager and file uploads work.
- Important old URLs still work or redirect correctly.
- No staging URLs remain in live content.
- Broken links have been fixed.
- SEO metadata is present on important pages.
- Search index has been rebuilt if required.
- Mobile and tablet layouts have been tested.
- Browser console errors have been reviewed.
- Joomla and server logs have been checked.
Only after this testing phase should the migrated Joomla website be considered ready for final SEO and performance optimisation. The next phase focuses on preserving search visibility, improving page speed and making sure the migrated website performs better than the old one.
Phase 6: SEO and Performance Checks After Joomla Migration
A Joomla migration is not complete when the website loads successfully. The migrated site also needs to preserve search visibility, maintain important URLs, avoid indexation problems and perform well for users. This phase focuses on SEO and performance checks after moving from Joomla 3, Joomla 4 or Joomla 5 to a newer version such as Joomla 6.
This step is especially important if the migration included changes to templates, menus, categories, aliases, routing settings, article structure or metadata. Even small changes can affect how search engines crawl, understand and rank your website.
Use a tool like Google Search Console to verify URL's are correctly indexing, redirects are working, sitemap is registered and the performance is well.
Check Whether Important URLs Still Work
URL stability is one of the most important SEO factors during a Joomla migration. If important pages change URLs without proper redirects, users may see 404 errors and search engines may lose the connection between the old page and the new page.
Before launch, test your most important URLs from the old website against the migrated version.
Important URLs include:
- Homepage
- Main product or service pages
- High-traffic articles
- Landing pages
- Category pages
- Download pages
- Support pages
- Pages with backlinks
- Pages used in ads, emails or social media campaigns
Each important old URL should either load the same content or redirect to the correct new page. Avoid redirecting unrelated old pages to the homepage. A redirect should lead users to the most relevant replacement page.
Create 301 Redirects for Changed URLs
If URLs changed during the migration, create 301 redirects from the old URLs to the new URLs. This is especially important when changing article aliases, category aliases, menu aliases or Joomla routing settings.
Common reasons URLs change during Joomla migration include:
- Different menu item structure
- Changed article aliases
- Changed category aliases
- New SEF routing settings
- Removed ID numbers from URLs
- Changed language prefixes
- Moved articles into different categories
- Replaced an old extension with a new one
Prepare a redirect map before launch where possible. A simple redirect map can use two columns:
| Old URL | New URL |
|---|---|
| /old-joomla-article | /new-joomla-article |
| /old-category/old-page | /new-category/new-page |
| /downloads/old-file | /downloads/new-file |
Redirects can be handled in different ways depending on your setup. You may use Joomla's Redirect component, .htaccess rules, Nginx rules, a hosting control panel such as Plesk, or a dedicated SEO extension. The best method depends on the size of the website and how many redirects are required.
Check for 404 Errors
After migration, check for 404 errors. Some broken URLs may not be obvious during manual testing, especially on larger websites.
Use a crawler, server logs or search console data to find:
- Broken internal links
- Old article URLs that no longer exist
- Broken category URLs
- Missing images
- Broken download links
- Old extension URLs
- Links pointing to the staging domain
Fix internal links where possible instead of relying only on redirects. Redirects are useful, but clean internal linking is better for users and easier to maintain.
Verify Page Titles and Meta Descriptions
Page titles and meta descriptions can change during a Joomla migration if menu items, article metadata, templates or SEO extensions are modified. Important pages should be checked manually.
Review:
- Browser page titles
- Article titles
- Menu item page titles
- Meta descriptions
- Robots settings
- Open Graph titles and descriptions, if used
For content-heavy websites, this is another area where spreadsheet-based editing can save a large amount of time. With Content Uploader Pro, you can export Joomla articles to Excel or CSV, review missing or weak metadata, improve it in bulk and import the updated values back into Joomla.
This is useful when you need to:
- Add missing meta descriptions to many articles
- Update old Joomla 3-focused page titles
- Standardise title formats
- Improve metadata for high-priority pages
- Clean duplicated descriptions
- Prepare SEO updates after restructuring categories
Review Canonical URLs
Canonical URLs help search engines understand which version of a page should be treated as the main version. During migration, canonical output may change because of template changes, SEO extension changes or routing differences.
Check canonical tags on important pages and confirm that they point to the correct final URL.
Common canonical problems include:
- Canonicals pointing to the staging domain
- Canonicals using HTTP instead of HTTPS
- Canonicals pointing to old URLs
- Missing canonicals on important pages
- Multiple canonical tags on one page
- Canonicals pointing to redirected URLs
If a canonical URL points to the wrong location, search engines may index the wrong page or ignore the page you actually want to rank.
Check Robots Settings
Staging websites are often set to noindex or blocked from crawling. Before launching the migrated site, make sure those settings are not accidentally carried over to production.
Check:
- robots.txt
- Global Joomla robots settings
- Menu item robots settings
- Article-level robots settings
- SEO extension robots settings
- Server-level noindex headers
- Password protection on the live domain
A common migration mistake is launching a website that still contains noindex rules from staging. This can seriously affect search visibility if not corrected quickly.
Regenerate and Submit the XML Sitemap
After migration, regenerate your XML sitemap. The sitemap should contain the final live URLs, not old URLs and not staging URLs.
Check that the sitemap includes:
- Important articles
- Important categories
- Main product or service pages
- Landing pages
- Multilingual URLs, if applicable
Also check that the sitemap excludes:
- Staging URLs
- 404 URLs
- Redirected URLs
- Internal search result pages
- Duplicate or low-value pages
- Pages marked noindex
Once the sitemap is correct, submit it in Google Search Console and any other webmaster tools you use.
Check Internal Links
Internal links help users and search engines discover your content. After migration, internal links should point directly to the correct final URLs.
Check links in:
- Article text
- Custom modules
- Menu items
- Footer links
- Landing page buttons
- Download pages
- Documentation pages
- Related article sections
Internal links should not point to staging domains, outdated paths, redirected URLs or HTTP versions of pages. If you find many internal links that need updating, consider fixing them in bulk rather than manually editing each article.
For article content, a spreadsheet export can help you identify old URLs inside article text and prepare updates more efficiently. This is especially helpful on older Joomla websites where internal links have accumulated over many years.
Check Structured Data
If your website uses structured data, test it after migration. Template changes, extension updates or content restructuring can affect schema output.
Examples of structured data to check include:
- Article schema
- Breadcrumb schema
- Product schema
- FAQ schema
- Organization schema
- Local business schema
- Review schema, if applicable
Structured data should describe the visible content accurately. Avoid carrying over outdated structured data from the old website if the page content has changed.
Verify Analytics and Conversion Tracking
Migration projects often break analytics or tracking scripts, especially when the template changes. Confirm that tracking still works before and after launch.
Check:
- Google Analytics or Matomo tracking
- Google Tag Manager
- Conversion events
- Download tracking
- Contact form tracking
- Button click tracking
- Ad conversion pixels
- Cookie consent integration
Do a real test conversion where possible. For example, submit a test contact form, download a sample file, click an important call-to-action button and verify that the event is recorded.
Check Website Performance After Migration
A Joomla migration is a good opportunity to improve performance. Newer Joomla versions, newer PHP versions and cleaner templates can improve speed, but performance should still be tested rather than assumed.
Review the following areas:
- Page load time
- Largest Contentful Paint
- Cumulative Layout Shift
- Interaction responsiveness
- Server response time
- Image sizes
- CSS and JavaScript loading
- Cache configuration
- Compression
- Database performance
Compare important pages before and after migration if you have old performance data. If the migrated site is slower, investigate before launch.
Enable Joomla Caching Carefully
Joomla caching can improve performance, but it should be enabled carefully after migration. Do not enable every cache option at once and assume everything still works.
Test caching with:
- Articles
- Category pages
- Contact forms
- Login areas
- Ecommerce pages
- Multilingual pages
- Dynamic modules
Some dynamic pages should not be cached in the same way as static article pages. If your site uses user-specific content, carts, forms or membership features, test those areas carefully.
Optimise Images
Images are often one of the biggest performance issues after migration. Older Joomla websites may contain large images uploaded directly from cameras or design tools without optimisation.
Check:
- Large article images
- Homepage hero images
- Gallery images
- Background images
- Logo files
- Icons
- Unused image files
Where appropriate, resize images to the dimensions actually needed on the website and use modern formats if your workflow supports them. Also check that image width and height attributes are used where possible to reduce layout shift.
If article image fields were cleaned during the content preparation phase, verify that the correct image paths are now used consistently across the migrated site.
Review CSS and JavaScript Loading
Template changes can introduce new CSS and JavaScript files. Old extensions can also continue loading scripts that are no longer needed.
Check whether the migrated website loads:
- Unused CSS files
- Duplicate JavaScript libraries
- Old jQuery plugins
- Large page builder assets
- Tracking scripts that are no longer used
- Font files that slow down rendering
Removing unnecessary assets can improve loading speed and Core Web Vitals. Be careful when disabling scripts, and always test interactive elements afterwards.
Enable Compression and Server-Level Optimisation
Check whether compression is enabled on the server. Gzip or Brotli compression can reduce the size of text-based files such as HTML, CSS and JavaScript.
Also review:
- PHP OPcache
- Browser caching headers
- HTTP/2 or HTTP/3 support
- CDN configuration, if used
- Static file caching
- Database indexes and slow queries, if relevant
Many of these settings are managed at hosting or server level. If you use Plesk or another hosting control panel, check the domain's PHP settings, Apache/Nginx settings and caching options.
Check Mobile Performance
Do not test only on desktop. Many SEO and user experience issues are more visible on mobile devices.
Check mobile pages for:
- Slow hero images
- Large layout shifts
- Buttons too close together
- Menus that are difficult to use
- Forms that are hard to complete
- Tables that overflow the screen
- Popups or banners that block content
- Font sizes that are too small
If the migration included a template change, mobile testing is essential. A design that looks good on desktop may still need adjustments for smaller screens.
Monitor Search Console After Launch
After the migrated site goes live, monitor Google Search Console regularly. Some issues only become visible after Google crawls the new version.
Watch for:
- Increase in 404 errors
- Pages excluded by noindex
- Server errors
- Redirect problems
- Sitemap errors
- Canonical warnings
- Mobile usability issues
- Core Web Vitals changes
- Changes in impressions and clicks
Some ranking fluctuation after a migration is normal, especially if URLs, content structure or templates changed. However, a large drop should be investigated quickly.
Use Content Uploader Pro for Post-Migration SEO Cleanup
Even after the technical migration is finished, there may still be content improvements to make. This is where Content Uploader Pro can continue to support the project.
After migration, you can use it to help with tasks such as:
- Bulk updating article titles
- Improving meta descriptions
- Cleaning aliases
- Moving articles into better categories
- Updating intro images and full article images
- Populating custom fields
- Standardising publishing settings
- Importing new migration-related content
- Refreshing old articles for the new Joomla website
This is useful because SEO cleanup often involves many small changes across many articles. A spreadsheet workflow makes those changes easier to review, approve and apply consistently.
SEO and Performance Checklist
Before considering the migrated Joomla website fully complete, confirm the following:
- Important old URLs still work or redirect correctly.
- 301 redirects are in place for changed URLs.
- 404 errors have been checked and fixed where possible.
- Internal links point to final live URLs.
- No links point to the staging domain.
- Page titles and meta descriptions are present on important pages.
- Canonical URLs point to the correct final URLs.
- Robots settings do not block important pages.
- The XML sitemap has been regenerated.
- The XML sitemap contains only valid final URLs.
- Structured data has been tested where used.
- Analytics and conversion tracking work.
- Important events such as downloads and form submissions are tracked.
- Joomla caching has been tested carefully.
- Images have been reviewed and optimised.
- CSS and JavaScript loading has been checked.
- Compression is enabled where possible.
- Mobile layout and mobile performance have been tested.
- Search Console has been monitored after launch.
- Content Uploader Pro has been used where bulk SEO cleanup is needed.
SEO and performance checks protect the value of the migration. The goal is not only to run the website on a newer Joomla version. The goal is to launch a migrated website that is cleaner, faster, easier to manage and better prepared for search visibility.
Phase 7: Bulk Optimise Content with Content Uploader Pro
By this stage, your Joomla website should be technically migrated, tested and checked for SEO and performance issues. However, many migration projects still leave one large task behind: improving the content itself.
This is where Content Uploader Pro becomes especially useful. A Joomla migration often reveals hundreds of small content issues that are too time-consuming to fix manually. Instead of opening every article one by one in the Joomla administrator, you can work with your content in Excel or CSV, make structured changes in bulk and import the updated data back into Joomla.
For small websites, manual editing may be manageable. For larger websites with hundreds or thousands of articles, a spreadsheet-based workflow can save many hours and reduce repetitive work.
Why Bulk Editing Matters After a Joomla Migration
A migration is often the first time a website owner reviews the full content structure in years. During testing, you may discover old article titles, missing metadata, inconsistent aliases, outdated images, empty custom fields or articles assigned to the wrong categories.
These problems may not stop the website from working, but they can affect SEO, user experience and long-term maintainability.
Common post-migration content tasks include:
- Updating old article titles
- Improving meta descriptions
- Cleaning aliases
- Moving articles into better categories
- Standardising intro images and full article images
- Updating publishing states
- Assigning or changing authors
- Populating custom fields
- Refreshing outdated content
- Creating new articles from prepared spreadsheet data
Doing this manually in Joomla can quickly become repetitive. With Content Uploader Pro, you can prepare these changes in a spreadsheet, review them clearly and import them in a controlled way.
Use Case 1: Update Existing Joomla Articles in Bulk
One of the most useful migration workflows is updating existing articles in bulk. After migration, you may want to improve many articles without creating duplicates.
For example, you may want to update:
- Article titles
- Aliases
- Intro text
- Full article text
- Categories
- Publishing state
- Featured state
- Access level
- Metadata
- Images
- Custom fields
A practical workflow looks like this:
- Export the existing Joomla articles.
- Open the file in Excel, LibreOffice Calc or another spreadsheet editor.
- Filter the articles that need changes.
- Update the required columns.
- Import the edited file back into Joomla.
- Verify that the existing articles were updated correctly.
The article ID or another unique identifier is important when updating existing content. It helps ensure that Joomla updates the correct articles instead of creating new ones.
Use Case 2: Improve Meta Descriptions Across Many Articles
Missing or weak meta descriptions are common on older Joomla websites. During a migration, these issues often become more visible because the site structure is being reviewed anyway.
Instead of opening every article manually, you can export your content and filter for articles where the meta description is empty or too generic.
Examples of weak meta descriptions include:
Welcome to our website.Read more about our services.Joomla article.- Descriptions copied across many pages
- Descriptions that refer to old Joomla versions or outdated offers
In a spreadsheet, you can add improved descriptions in a dedicated metadata column and import them back into Joomla.
| Article | Old Meta Description | Improved Meta Description |
|---|---|---|
| Joomla Migration Checklist | Follow this practical Joomla migration checklist before upgrading from Joomla 3, 4 or 5 to Joomla 6. | |
| Import Joomla Articles from CSV | Import articles. | Learn how to import Joomla articles from CSV and prepare article titles, aliases, categories, images and metadata in bulk. |
This can improve search result presentation and make your content library more consistent.
Use Case 3: Clean Article Aliases Before or After Migration
Aliases are important because they often form part of Joomla URLs. Older websites may contain aliases with spelling mistakes, outdated dates, inconsistent formatting or unclear wording.
Examples of alias problems include:
joomla-migration-oldtest-article-2our-services-new-finaljoomla-3-upgrade-2019article-copy
With a spreadsheet export, you can review article titles and aliases side by side. This makes it easier to decide which aliases should remain unchanged and which should be improved.
Be careful when changing aliases. If an alias change affects the public URL of an indexed page, create a 301 redirect from the old URL to the new one. For pages with existing search traffic or backlinks, preserving the URL may be better than changing it.
Use Case 4: Move Articles Into a Better Category Structure
Category cleanup is another common migration task. Many Joomla 3 websites contain categories that are no longer useful, such as old year-based categories, temporary categories or broad categories that no longer describe the content well.
After migration, you may want to move articles into a clearer Joomla 6 content structure.
Example changes:
| Old Category | New Category | Reason |
|---|---|---|
| Old News | Archive | Old articles should remain available but not appear in main navigation. |
| Joomla | Joomla Guides | More descriptive category for tutorial content. |
| Uncategorised | Documentation | Important articles need a proper category assignment. |
With Content Uploader Pro, category changes can be prepared in a spreadsheet and imported in bulk. This is useful when hundreds of articles need to be reassigned.
Before changing categories, check whether your Joomla URLs include category aliases. If they do, category changes may also change URLs. For SEO-critical pages, prepare redirects before launch.
Use Case 5: Standardise Article Images
Article images often become inconsistent over time. Some articles may have intro images but no full article images. Others may use very large image files, old folder paths or missing image fields.
During or after migration, review:
- Intro image paths
- Full article image paths
- Image alt text
- Image captions
- Image folder structure
- Image file names
In a spreadsheet, you can prepare consistent image references for many articles at once. This is useful when redesigning article layouts, improving category blog pages or standardising how content appears across the site.
For example, you may decide that every article in a specific category should have an intro image. Instead of editing each article manually, prepare the image paths in Excel or CSV and import the updated values.
Use Case 6: Populate Custom Fields
Custom fields are one of the most powerful Joomla features for structured content. After migrating to a newer Joomla version, you may want to use custom fields more extensively.
For example, a website may use custom fields for:
- Product specifications
- Download links
- Video URLs
- Difficulty levels
- Article types
- Location data
- Event information
- Internal notes
- Migration status
Populating custom fields manually can take a long time. A spreadsheet workflow allows you to prepare structured values in columns and import them into Joomla articles.
This is especially useful when converting old unstructured content into a cleaner Joomla 6 content model.
Use Case 7: Create New Joomla Articles From Excel or CSV
Not every migration task involves updating existing articles. Sometimes the migration project includes creating new content, such as landing pages, documentation pages, support articles or imported content from another system.
With Content Uploader Pro, you can prepare new Joomla articles in Excel or CSV and import them into Joomla.
This can be useful for:
- Creating new SEO landing pages
- Importing documentation articles
- Adding product-related content
- Preparing support articles
- Importing migrated content from another CMS
- Creating article drafts for review
A typical import file may include:
- Title
- Alias
- Category
- Intro text
- Full text
- Publishing state
- Access level
- Language
- Meta description
- Intro image
- Full article image
- Custom field values
Use Case 8: Final Content Sync Before Launch
For complex migrations, the staging site may be prepared over several days or weeks. During that time, the live website may still receive new articles or article updates.
Before launch, you need to decide how to handle this gap. One option is to freeze content changes during the final migration. Another option is to export the latest article changes from the live website and import them into the migrated version.
Content Uploader Pro can support this type of workflow when articles need to be moved or updated between Joomla installations.
This can be useful when:
- The staging site has already been migrated.
- The live site has received new articles during testing.
- Editors updated important content after the staging copy was created.
- You need to bring selected article changes into the final Joomla 6 website.
This should be handled carefully. Always test the process on staging and make sure the correct articles are updated.
Recommended Bulk Optimisation Workflow
For most Joomla migration projects, the safest workflow is:
- Create a full backup.
- Work on a staging site.
- Export existing articles.
- Review the spreadsheet and decide what needs updating.
- Make a small test change first.
- Import the test file.
- Check the result in the Joomla administrator.
- Check the result on the frontend.
- Prepare the full import file.
- Import the full file only after the test is successful.
- Review logs and check a sample of updated articles.
Do not start with a full import of thousands of records. A small test import helps confirm that the columns, categories, images, custom fields and update settings are correct.
Example: Updating 500 Articles After Migration
Imagine a Joomla 3 website has been migrated to Joomla 6. The technical migration works, but the content still needs cleanup. There are 500 articles with inconsistent metadata, old categories and missing intro images.
Manual workflow:
- Open each article in Joomla.
- Edit the title or metadata.
- Change the category.
- Add or update the image.
- Save the article.
- Repeat hundreds of times.
Spreadsheet workflow with Content Uploader Pro:
- Export the articles.
- Filter articles by category or missing metadata.
- Edit the required fields in Excel or CSV.
- Review the changes before importing.
- Import the updated file into Joomla.
- Check the result.
The second workflow is more structured and easier to review. It is also easier to involve content editors, SEO specialists or clients because they can work with spreadsheet data instead of navigating the Joomla administrator article by article.
Where Content Uploader Fits in the Migration Process
Content Uploader Pro can be useful at several stages of a Joomla migration.
| Migration Stage | How Content Uploader Pro Helps |
|---|---|
| Before migration | Export existing articles, review content quality and prepare cleanup decisions. |
| During staging | Test article updates, category changes, metadata imports and custom field workflows safely. |
| After migration | Bulk update migrated content, improve metadata and standardise article data. |
| Before launch | Sync selected article changes from the old site to the migrated site where needed. |
| After launch | Continue improving SEO, categories, images and custom fields without manual article-by-article editing. |
This makes Content Uploader Pro more than a simple import tool. It becomes part of a structured Joomla content migration workflow.
Best Practices When Importing Content During a Migration
Bulk imports are powerful, so they should be handled carefully. Follow these best practices to avoid mistakes:
- Always create a backup before importing large updates.
- Test imports on a staging site first.
- Start with a small sample file.
- Use article IDs or another reliable identifier when updating existing articles.
- Check category names and IDs carefully.
- Verify image paths before importing.
- Check custom field mapping before importing many records.
- Keep a copy of the original export file.
- Document what each import changes.
- Review the frontend after importing.
The goal is not simply to import data quickly. The goal is to import the right data, into the right fields, with a result that is easy to verify.
How the Content Uploader Pro can help during the process
If your Joomla migration includes a large amount of article content, manual editing can quickly become one of the most time-consuming parts of the project. Content Uploader Pro helps by moving that work into a spreadsheet-based workflow.
You can use it to export, prepare, update and import Joomla articles using Excel or CSV. This is useful for Joomla 3 to Joomla 6 migrations, Joomla 4 to Joomla 6 upgrades, content restructuring projects, SEO cleanup and bulk article creation.
For migration-specific workflows, you may also find this guide useful:
Migrate Joomla 3 Content to Joomla 5 or Joomla 6
Bulk Optimisation Checklist
Use this checklist when optimising Joomla content after migration:
- Export existing Joomla articles to Excel or CSV.
- Keep a copy of the original export file.
- Identify articles that need updates.
- Improve missing or weak metadata.
- Review aliases before changing URLs.
- Prepare redirects for changed URLs.
- Clean category assignments.
- Standardise article images.
- Populate custom fields where useful.
- Test a small import on staging first.
- Verify updated articles in the administrator.
- Verify updated articles on the frontend.
- Check SEO-critical pages after import.
- Document each bulk import.
- Create a fresh backup before large imports on the live site.
A Joomla migration is the ideal moment to improve your content database. By combining careful migration planning with Content Uploader Pro, you can move to a newer Joomla version and also create a cleaner, better organised and more SEO-friendly website.
Joomla Migration Checklist
Printable todo list for planning, executing and testing a Joomla migration.
Before the Migration
- Confirm the current Joomla version.
- Confirm the target Joomla version.
- Check the recommended upgrade path.
- Review PHP, database and web server requirements.
- Check whether the hosting environment supports Joomla 6.
- Create an inventory of installed extensions.
- Check extension compatibility with the target Joomla version.
- Update all compatible extensions.
- Remove unused or abandoned extensions.
- Review template compatibility.
- Check template overrides.
- Identify custom PHP, CSS or JavaScript changes.
- Review third-party integrations.
- Decide whether the existing template will be kept or replaced.
- Define the migration scope.
- Decide whether content will be cleaned before or after migration.
- Export important Joomla content if bulk review is required.
- Identify high-priority SEO pages.
- Record important existing URLs.
- Prepare a migration timeline.
Backup and Staging Checklist
- Create a full website backup.
- Back up all Joomla files.
- Export the full database.
- Download or securely store the backup outside the live website.
- Verify that the backup completed successfully.
- Test the backup restore if the website is business-critical.
- Create a staging copy of the website.
- Protect the staging site from search engines.
- Password-protect the staging site where possible.
- Update staging configuration paths.
- Disable live email sending on staging if needed.
- Disable payment gateways or switch them to test mode.
- Disable scheduled tasks that could modify data.
- Confirm that staging behaves like the live site before migration.
Content Preparation Checklist
- Review article titles.
- Review article aliases.
- Identify URLs that should not change.
- Find outdated articles.
- Find duplicate or near-duplicate articles.
- Decide which articles should be kept, improved, archived or deleted.
- Review category structure.
- Identify categories that should be merged or renamed.
- Check intro images and full article images.
- Check image paths and missing files.
- Review meta descriptions.
- Review browser page titles.
- Review custom fields.
- Review multilingual article associations if used.
- Prepare redirects for changed URLs.
- Use Content Uploader Pro to export Joomla articles to Excel or CSV where bulk review is needed.
- Use a spreadsheet to clean titles, aliases, categories, metadata, images and custom fields.
- Test content imports on staging before applying them to the final website.
Migration Execution Checklist
- Update the current Joomla branch to its latest version.
- Update all compatible third-party extensions.
- Remove incompatible extensions that are no longer needed.
- Disable extensions that must not run during migration.
- Check the Joomla pre-update information.
- Resolve PHP or database requirement warnings.
- Switch PHP version only when required and tested.
- Migrate one major Joomla version at a time where appropriate.
- Check administrator access after each major upgrade.
- Check frontend loading after each major upgrade.
- Review PHP and Joomla error logs.
- Apply Joomla database fixes where required.
- Update extensions again after each major Joomla upgrade if needed.
- Document all migration steps.
- Document every error and fix.
- Do not continue to the next major version while the current stage is unstable.
Post-Migration Testing Checklist
- Test the homepage.
- Test important article pages.
- Test category blog pages.
- Test menu items.
- Test hidden menu items used for routing or SEO.
- Test modules and module positions.
- Test contact forms.
- Test email sending.
- Test login and logout.
- Test user registration if used.
- Test password reset.
- Test user permissions and access levels.
- Test ecommerce, booking or membership functionality if used.
- Test search and filters.
- Rebuild Smart Search index if used.
- Test Media Manager.
- Test file uploads.
- Test third-party components on frontend and backend.
- Test Content Uploader Pro export and import workflows if used.
- Check mobile layout.
- Check tablet layout.
- Check browser console errors.
- Review Joomla logs.
- Review server logs.
SEO and Performance Checklist
- Check that important old URLs still work.
- Create 301 redirects for changed URLs.
- Check for 404 errors.
- Fix broken internal links.
- Remove links to staging URLs.
- Check page titles.
- Check meta descriptions.
- Check canonical URLs.
- Check robots settings.
- Remove noindex rules from live pages that should be indexed.
- Regenerate the XML sitemap.
- Submit the XML sitemap in Google Search Console.
- Check structured data if used.
- Verify analytics tracking.
- Verify conversion tracking.
- Check download tracking if used.
- Check contact form tracking if used.
- Review page speed.
- Optimise large images.
- Enable or test caching carefully.
- Check compression such as Gzip or Brotli.
- Check mobile performance.
- Monitor Search Console after launch.
Joomla Migration FAQ
Can I migrate directly from Joomla 3 to Joomla 6?
In most cases, you should not treat Joomla 3 to Joomla 6 as one direct update. A safer approach is to migrate step by step through the major versions, testing after each stage. A typical path is Joomla 3.10 to Joomla 4, then Joomla 4.4 to Joomla 5, and finally Joomla 5 to Joomla 6 when all requirements are met.
Why is Joomla 3 to Joomla 6 migration more complex than smaller upgrades?
Joomla 3 websites often use older extensions, templates and PHP code. Joomla 6 requires a much newer server environment and modern extension compatibility. The migration is not only a Joomla core update; it may also require extension updates, template changes, PHP compatibility fixes, content cleanup and SEO checks.
Should I migrate my live Joomla website directly?
Whenever possible, no. Create a staging copy first and perform the migration there. This allows you to find and fix problems without affecting visitors. Only migrate the live site when the staging migration has been tested successfully.
What is the most important step before a Joomla migration?
The most important step is creating a complete backup that includes both files and database. The backup should be stored outside the live website and, ideally, tested before the migration begins.
Which backup tool should I use for Joomla?
Many Joomla users use Akeeba Backup because it creates portable site backups and is widely used in the Joomla community. You can also use hosting-level backups, Plesk Backup Manager, cPanel backups, server snapshots, or manual file and database exports. For important websites, using more than one backup method is sensible.
Why do I need a staging site?
A staging site lets you test the migration safely. You can update Joomla, test extensions, switch PHP versions, check the template, clean content and fix errors without risking the live website.
What usually breaks during a Joomla migration?
Common issues include incompatible extensions, outdated templates, old template overrides, PHP fatal errors, missing images, broken forms, changed URLs, database warnings, missing modules and JavaScript conflicts.
Do Joomla article URLs change during migration?
They can. Joomla URLs may change if menu items, aliases, categories, routing settings or language settings change. Important URLs should be tested before launch. If URLs change, create 301 redirects from the old URLs to the new URLs.
How can I prepare Joomla content before migration?
You can review articles, categories, aliases, metadata, images and custom fields before migration. For larger websites, exporting articles to Excel or CSV makes this much easier because you can filter, sort and edit content in bulk.
How does Content Uploader Pro help with Joomla migration?
Content Uploader Pro helps by moving content preparation and cleanup into a spreadsheet workflow. You can export Joomla articles, edit them in Excel or CSV, and import the updated data back into Joomla. This is useful for updating titles, aliases, categories, metadata, images, publishing states and custom fields during or after a migration.
Can I use Content Uploader Pro to update existing Joomla articles?
Yes. Content Uploader Pro can be used to update existing Joomla articles when the import file contains the correct identifying information. This is useful when you want to improve existing migrated content without manually editing each article.
Can I use Content Uploader Pro to create new Joomla articles?
Yes. You can prepare new Joomla articles in Excel or CSV and import them into Joomla. This is useful for creating documentation pages, landing pages, support articles, product content or migrated content from another source.
Is content cleanup better before or after migration?
Both approaches can work. Cleaning content before migration can reduce clutter and make the migration easier to manage. Cleaning content after migration allows you to work directly in the new Joomla environment. For many projects, the best approach is to export and review content before migration, test changes on staging, then apply final content updates after the technical migration.
Do I need to update my Joomla template during migration?
Possibly. If your current template or template framework does not support the target Joomla version, you will need to update or replace it. Even if the template loads, check template overrides carefully because old override files can break article, category, module or contact layouts.
How long does a Joomla migration take?
A small Joomla website with few extensions may be migrated relatively quickly. A larger website with many articles, custom templates, third-party extensions and SEO-sensitive URLs can take much longer because planning, staging, testing and cleanup are required. The technical update may be only one part of the total migration project.
Will a Joomla migration affect SEO?
It can. SEO problems usually happen when URLs change without redirects, metadata is lost, pages are blocked by robots settings, internal links break, sitemap URLs are wrong or important content changes unexpectedly. A careful SEO checklist reduces these risks.
What should I check after launching the migrated Joomla site?
After launch, check important URLs, redirects, forms, search, login, metadata, sitemap, analytics, page speed and Search Console reports. Also review server logs for errors that may not be visible during manual testing.
Final Thoughts: Make Your Joomla Migration More Than an Upgrade
A Joomla migration should not only move your website from an old version to a new version. It should leave you with a cleaner, safer, faster and easier-to-manage website.
That means planning the migration carefully, creating a reliable backup, testing everything on staging, checking extension and template compatibility, preserving SEO value and reviewing your content structure. For websites with many articles, content preparation is often one of the biggest opportunities.
Instead of manually editing hundreds of articles, Content Uploader Pro lets you export Joomla content to Excel or CSV, clean and improve it in bulk, and import the updated data back into Joomla. This makes it especially useful for Joomla 3 to Joomla 6 migrations, content restructuring projects and post-migration SEO cleanup.
If your migration includes large amounts of Joomla article content, a spreadsheet-based workflow can save time, reduce repetitive work and help you launch a better organised Joomla website.